Being from the South, one of my favorite meals is BBQ pulled pork!
I especially love BBQ pulled pork on a nice hot sesame bun and a slather of cole slaw. Oh yum!
I wanted to re-create this dish using some healthier alternatives.


I definitely had to ditch the bun. No bun hun!


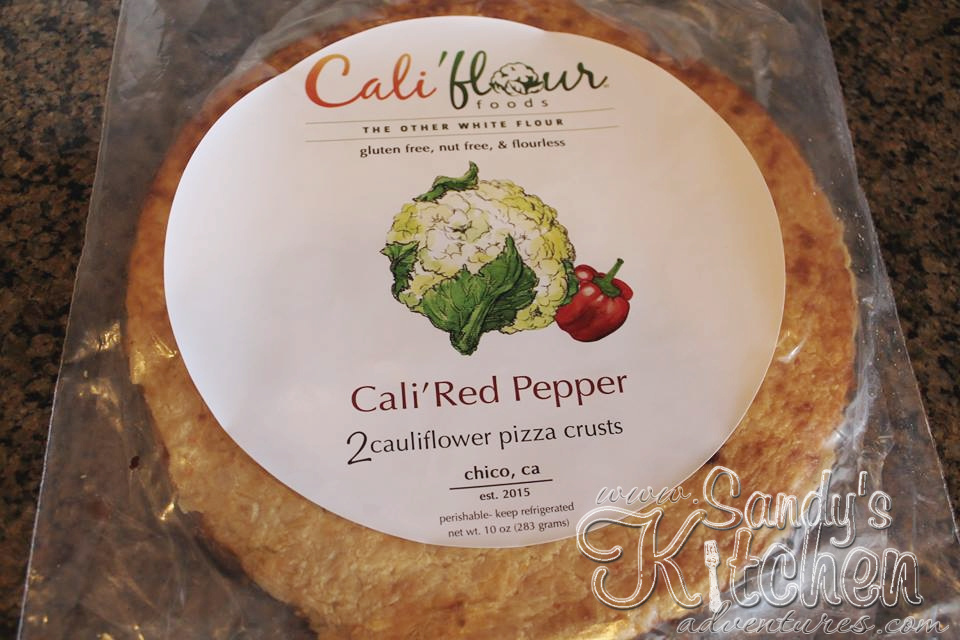
I decided to use the already prepared cauliflower pizza crust from Cal'flour Foods. Why do I love them so much?

I love not having to spend an entire afternoon making my own crusts. They comes shipped to my door in a matter of days by priority mail! Talk about convenience!

I also love the taste of these crusts and that they come in two yummy flavors which are Italian and Plain!

No soggy veggie crusts and they bake up nicely!

You can purchase them HERE!


The next thing I did was choose leaner chicken breasts over pork. This allowed me to use up a healthy fat, which is the mayo, to make the cole slaw that tops the pizza. 

To make the pulled BBQ chicken, I decided to use my new Instant Pot! I am still fairly new to the whole pressure cooker scene, but so far I am loving it! If you don't have an Instant Pot, don't worry! Use your trusty old slow cooker! I still love my slow cooker!

The Instant Pot does cook up faster than a slow cooker, but don't think the 25 minute cooking time is all there is to it. It takes about 10 minutes for the Instant Pot to come to pressure. Then 25 minutes to cook and then tack on the 10 to 15 minutes (maybe more) to do a natural pressure release. You still get to have delicious BBQ pulled chicken in a little over an hour, instead of the usual 6 to 8 hours! Sounds pretty good to me!

I added just the chicken breasts and root beer to the instant pot and the chicken turned out extremely moist and sooo yummy! You can also add any extra seasonings if you like, but I didn't add anything else. The root beer helps tenderize the meat as well as give it a slightly sweetened flavor. If you don't have root beer, coca cola works too!

This is the shredded chicken before adding the BBQ sauce.


After your chicken is cooked, drain the meat. Add the chicken to a bowl so you can add your BBQ sauce. I get asked often about which BBQ sauce I like to use. There are mainly two brands that I enjoy.


The one above, G Hughes Smokehouse Sugar Free Hickory BBQ sauce, is the one I used for this recipe. It is easy to find at your local grocery stores so you don't have to order it online. I found this one at Wally World by all the other BBQ sauces. I can't say that I like all their flavors though. I couldn't stand the Maple Brown flavor so I had to toss it, but Hickory is quite good.


The other sugar free BBQ sauce I like is Guy's Award Winning BBQ Sauce. I have only found this sauce online which comes in 5 flavors: Hot, Original, Smokey Bacon, Smokey Garlic and Spicy. My favorite? Smokey Garlic! I have tried all of them and they were all yummy! You can find them HERE.


Once you have your BBQ pulled chicken set aside, make the cole slaw using already packaged cole slaw mix or shredded cabbage. I left the carrots in the mix because the slaw is only 5 grams of carbs for the entire 1 1/2 cups. A Green on the Medifast plan must be below 5 grams of carbs per 1/2 cup. Besides... the little orange pieces add color!


I added 2 tbsp of reduced fat mayo, 1/2 tsp apple cider vinegar, and about 1/2 a packet of Stevia to the cole slaw mix. I like to use Splenda Naturals Stevia packets or Nu Naturals Stevia packets. Both sweeteners work well for cooking. Set aside the cole slaw until the pizza is hot out of the oven!


Place your cauliflower pizza crust on parchment paper (not waxed) and bake for about 5 minutes in a pre-heated oven. Doesn't that crust look delicious?


Add 6 ounces of pulled BBQ chicken on top of the crust.


Drizzle more BBQ sauce on top if desired! I desire!


Sprinkle shredded sharp cheddar cheese over the chicken and bake for about 10 to 12 minutes or until cheese is melted.


Once the pizza is out of the oven, then add the prepared cole slaw.


Cut into 4 slices...


... but you can have two of those yummy slices! Crunchy creamy cole slaw over sweet BBQ chicken! Yes please! Enjoy this yummy recipe!


Pulled BBQ Chicken Pizza

Ingredients:

6 ounces Prepared Pulled BBQ Chicken ~ Recipe Below (1 Lean, 3 Condiments)
1/2 cup 2% Sharp Cheddar Cheese, Shredded (1/2 Lean)

For the Slaw:

1 1/2 cup Shredded Cole Slaw Mix or Shredded Cabbage (3 Greens)
2 tbsp Reduced Fat Mayo (2 Healthy Fats)
1/2 tsp Apple Cider Vinegar
1/2 Packet Stevia, or to taste (1/2 Condiment)

For the Instant Pot or Slow Cooker Pulled BBQ Chicken:

36 ounces Chicken Breasts (4 Leans)
12 ounces Diet Root Beer
3/4 cup G Hughes Smokehouse Sugar Free Hickory BBQ Sauce (12 Condiments)

Directions:

Place chicken and root beer in the Instant Pot.
If you would like to add any other seasonings such as salt, pepper, garlic powder, etc, 
please do so at this time. I added the root beer only.
Put the lid on the Instant Pot and turn the float valve to sealing.
Press the poultry setting button and adjust the cooking time to 25 minutes.
When done cooking, do a 10 to 15 minute natural pressure release.
After 10 to 15 minutes, there may still be some pressure left in the pot.
That is okay. Just turn the float valve to venting to release the rest of the pressure.
Wear an oven mitt and be careful of the steam! 
This ensures moist chicken.
Drain the chicken and shred with a fork.
Add BBQ sauce and set aside.

If using a slow cooker, cook the chicken and root beer on 
Low for 6 to 8 hours or High for 3 to 4 hours. 
Drain the chicken and shred with a fork. 
Add BBQ sauce and set aside.

Reserve 6 ounces of pulled BBQ chicken for the recipe and store the rest as left overs.

~~~~~~~~~~~~~~~~~~~~~~~~~~~~~

Make the slaw.
Place cole slaw mix or shredded cabbage in a small bowl.
Add mayo, apple cider vinegar, and stevia to taste.
Set aside.

~~~~~~~~~~~~~~~~~~~~~~~~~~~~~

Preheat oven to 375 degrees.
Add parchment paper on top of a pizza pan.
Place cauliflower pizza crust on parchment paper.
Bake for 5 minutes.

Top pizza crust with 6 ounces of pulled BBQ chicken.
Drizzle any extra BBQ sauce on top if desired.
Sprinkle shredded cheddar cheese on top.
Bake for 10 to 12 minutes or until cheese is melted.

Top with cole slaw.

Makes 2 Servings

Each Serving (half of the pizza) provides:
1 Lean, 3 Greens, 1.75 Condiments, and 1 Healthy Fat


Sometimes I just want a delicious grilled cheese sandwich, but I don't want all the carbs that come with eating traditional white or wheat bread! I also don't want to sabotage all the hard work I put in to staying on plan! So what is a girl to do?

Come up with another alternative!

These "bread" slices made from grated cauliflower are actually pretty tasty! No, they don't really taste like bread, but it sure does help hold all that yummy cheese and sliced turkey breast together! I find that cauliflower can mimic a lot of  different foods such as pizza crusts, breads, pasta, etc so it just so happens to be one of my favorite veggies right about now!

I do find these "bread" slices to be a little bit more time consuming than using regular bread and you do have to be extra careful with flipping them over on the skillet. But that's okay! My health will thank me later!


I used my large electric griddle to cook these babies up. It allowed me to cook all four slices at once so it took less time to make them. Just remember to be very patient and careful when flipping the slices. You don't want the slices to fall apart! Get them nice and golden before you flip them. Once you have your slices done, top with cheese and turkey slices and cook until the cheese has melted. Delish!

The recipe below makes two yummy servings so make sure you have someone to share it with or you could always save the other one for tomorrow! Stick it in the fridge and then heat it up in the skillet again the following day! Serve with 1 Green of your choice to complete your Lean and Green meal!


Grilled Turkey and Cheddar "Sandwich"

Ingredients:
2 cups grated cauliflower (4 Greens)
1 egg (1/3 Lean)
1/4 cup freshly grated reduced fat Parmesan cheese * (2 Condiments)
1/4 tsp dried Italian seasoning (1/2 Condiment)
2/3 cup shredded 2% sharp cheddar cheese (2/3 Lean)
7 ounces thinly deli sliced turkey breast (1 Leanest)

Directions:
In a medium bowl, combine grated cauliflower, egg, Parmesan cheese, 
and Italian seasonings. Mix until evenly combined. Set aside.

Heat a large non-stick skillet or griddle over medium heat.
Spray with cooking spray. Scoop the cauliflower mixture into a small patty and place on the skillet or griddle. Repeat to form a second, third and fourth patty. These are your "bread" slices.

Press down on the pieces with a spatula and cook until golden underneath,
about 5 minutes. Flip carefully and cook until the other sides are golden, about 3 minutes more.

Top a cauliflower slice with 1/3 cup cheese and 3.5 ounces of turkey. Place a cauliflower slice on top. Repeat with the other two slices. You will have two sandwiches. Cook until cheese is melted, about 2 minutes more per side.

Makes 2 Servings
Each serving provides
1/2 Lean, 1/2 Leanest, 2 Greens, and 1.25 Condiments per Sandwich

(You still need 1 more Green and 1 Healthy Fat for the day.)

* If you can't find freshly grated reduced fat Parmesan cheese, use regular Parmesan cheese. It would then be 2.25 Condiments per serving.


This was delicious! The important part is to make sure your shredded chicken is already seasoned. Nothing is worse than plain old chicken without any seasonings. I used rotisserie chickens form the grocery store to save time. Then I removed the skin, the bones, and shredded the chicken breasts only. The meat is already seasoned and made for you so it makes this meal quick and easy! You all know how I love those kind quick and easy meals!


Put the shredded chicken at the bottom of a 2 quart casserole dish that has been sprayed lightly with cooking spray.


Sprinkle dried basil and dried oregano over the chicken. Then combine the light laughing cow cheese with plain Greek yogurt in a small bowl. You may need to heat up the laughing cow cheese for about 10 to 15 seconds in the microwave so that it blends well with the yogurt. You could also use 6 tbsp of light cream cheese in place of the light laughing cow cheese, but I prefer the laughing cow cheese because of the variety of flavors they come in. Spread it over the chicken.


Spread blended Italian diced tomatoes that is less than 5 grams of carbs per 1/2 cup. Great Value from Walmart is a great choice!


Sprinkle grated parmesan cheese and shredded mozzarella cheese on top.


Bake for about 30 minutes or until cheese has melted. A yummy quick meal that pairs nicely with zucchini noodles or spaghetti squash. You would need 1 cup of zucchini noodles or spaghetti squash per serving of Italian Chicken Bake to complete your Lean and Green meal! Enjoy!


Italian Chicken Bake

Ingredients:
12 ounces shredded chicken breasts, cooked (2 Leaner Leans)
1 tsp dried basil (1/2 Condiment)
1/2 tsp dried oregano (1/2 Condiment)
1 1/2 cups Great Value Italian diced tomatoes, blended (3 Greens)
6 wedges of light laughing cow cheese - any flavor will do (3 Healthy Fats)
1/2 cup low fat plain Greek yogurt (1/3 Leaner Lean)
2/3 cup shredded part-skim mozzarella cheese (2/3 Lean)
1/4 cup grated reduced fat parmesan cheese (2 Condiments)

Directions:
Preheat oven to 350 degrees.  Lightly spray a 2 quart casserole dish with cooking spray. Place shredded chicken at the bottom of prepared dish.  Sprinkle basil and oregano over shredded chicken breasts. Use any additional garlic powder, salt, or pepper to season your chicken if it isn't seasoned already. I used store bought rotisserie chicken so it was already seasoned.

Combine light laughing cow cheese and yogurt in a small bowl. 
You may need to microwave the laughing cow cheese for about 10 to 15 seconds to soften it up a bit so that it blends easier with the yogurt. Spread yogurt mixture over chicken. Then spread tomato sauce over yogurt mixture. Top with parmesan cheese and mozzarella cheese. Bake for about 25 to 30 minutes or until the casserole begins to bubble and cheese is melted.
Divide into three equal portions.

3 Servings with 
1 Lean, 1 Green, 1 Condiment, and 1 Healthy Fat per Serving


I love crock pot recipes and for good reason! Being a busy mom of two little ones always feels like there is never enough time in the day, especially for cooking! But of course.... we got to eat! I don't want to resort to unhealthy choices for my family and I because of lack of time or planning. All you have to do is throw these recipes together and just forget about it.

This recipe has  lot of flavor so you aren't eating plain old shredded chicken from the crock pot! Also, the meat is moist and tender as long as you don't over cook it! I cooked mine for about 7 hours, but it will depend on your slow cooker. Not to mention this makes 5 servings so you have some left overs! I served this chicken with grated cauliflower (as rice) my first night and had it as lettuce wraps and zucchini chips my second night. Variety is key when trying to eat healthy so that you never get bored with your meals. 

Enjoy!


Crock Pot Thai Chicken

Ingredients:

40 ounces raw boneless, skinless chicken breasts (5 Leaner Leans)
1 1/4 cup lite coconut milk (5 Healthy Fats)
1/2 cup PB2 aka powdered peanut butter (4 Snacks)
1/4 cup water
1 tbsp lite soy sauce (1 Condiment)
2 tbsp fresh lime juice (3 Condiments)
1/2 cup salsa (8 Condiments)
1/2 tsp ground ginger (1 Condiment)
1/2 tsp garlic powder (1 Condiment)
1 packet stevia - optional (1 Condiment)
Chopped cilantro for garnish

Directions:

Place raw chicken in the crock pot.
In a medium sized bowl, combine the rest of the ingredients. 
Stir until mixed thoroughly. Pour over chicken.
Cook on High for 3 to 4 hours or on Low 6 to 8 hours.
When cooked, shred chicken breasts with a fork.
Stir the shredded chicken with the sauce.
Divide into 5 equal portions.

5 Servings with 1 Leaner Lean, 3 Condiments, 1 Healthy Fat, and 0.8 Snacks per serving


I absolutely love grated cauliflower, especially when it is used as rice.
Trader Joes and a few other grocery stores sell pre-packaged grated cauliflower ready to use! Customers were going Ga-Ga over them! I remember when Trader Joes first started selling them, they were always sold out and it took some time before they had them in stock again! It was crazy! I guess I can understand why so many people loved them... they were convenient and required a little less prep work when preparing meals. I have used the pre-packaged grated cauliflower, but I actually prefer to grate it myself. I think it saves a little bit of money and it is so easy to do with a food processor. No matter if you purchase cauliflower already grated or if you grate it yourself, there are some creative ways to eat it such as avocado cauliflower rice!


This avocado cauliflower rice is creamy and delicious! It kind of reminds me of yummy guacamole mixed with rice since it has cilantro and lime in it. This is the perfect side dish that is sure to be a definite crowd pleaser! Keep in mind that if you are following the Optavia 5 and 1 plan, you need to choose a Leanest Lean to accompany this dish since this it already contains 2 Healthy Fats. Some great options are fish, shellfish, ground turkey or other meat that is more than 98% lean.


Start off by mashing 1 1/2 ounces of avocado with a fork.  Add fresh lime juice, garlic powder, salt and chopped cilantro. Set aside.


Heat a tsp of oil in a skillet. I used Stacey Hawkins Roasted Garlic oil to give the cauliflower more flavor. I love her flavored oils! If interested, you can purchase it HERECook cauliflower rice over medium heat for about 5 to 8 minute in a covered skillet.


Add the avocado mixture to the cauliflower rice. Stir until combined and heated thoroughly. If you have the cauliflower rice already prepped, this side dish is ready in less than 15 minutes! It is a nice change from eating plain cauliflower rice! I served it with grilled tilapia seasoned with Mrs. Dash Southwestern Chipotle Seasoning Blend. What a delicious Lean and Green! Enjoy!

Avocado Cauliflower Rice

Ingredients:
1 1/2 ounces avocado (1 Healthy Fat)
2 tsp fresh lime juice (1 Condiment)
1/8 tsp garlic powder (1/4 Condiment)
1/4 tsp salt (1 Condiment)
1/4 cup chopped cilantro (1/4 Condiment)
1 tsp Stacey Hawkins Roasted Garlic Oil or Olive Oil (1 Healthy Fat)
1 1/2 cups raw grated cauliflower (3 Greens)

Directions:
In a small bowl, mash avocado with a fork. 
Add lime juice, garlic powder, salt, and cilantro. Stir until combined. 
Continue mashing to get the mixture as smooth as possible.
Set aside.

Add 1 tsp oil to a medium sized skillet and heat over medium heat.
Add grated cauliflower. 
Cover skillet with a lid so that the cauliflower steams and becomes tender. 
Cook for about 5 to 8 minutes stirring occasionally.

Add avocado mixture to the cauliflower.
Mix until cauliflower is evenly coated. Heat thoroughly.

Makes 1 Serving
Each serving provides
3 Greens, 2.5 Condiments and 2 Healthy Fats


I found this recipe several years ago on www.Food.com and it has been my "go to" burger recipe from then on out. The recipe is pretty basic without any flavor add-ins... just a juicy delicious burger. I have experimented with some of the suggested flavor add-ins and some of them are really tasty such as BBQ sauce, teriyaki sauce, cajun seasoning, sour cream, fresh herbs, diced jalapenos, sesame oil and more! If you decide to use any of them, don't forget to count them towards your condiments or healthy fats. Also, if you choose one of the healthy fats, you will have to choose a leaner ground beef. I used 93% lean ground beef, so no healthy fat is required.

Here is the original recipe, if you want to check out some of their flavor add-ins.


I think the important part to remember when making a great burger is to loosely make the patties. Handle the meat as little as possible. Don't keep squishing and patting the meat together. This helps make them juicier!

Also when grilling, do not press the burgers down with a spatula. My husband thinks he is the number one grill master and he does this all the time! I constantly have to tell him he is letting all the wonderful juices escape when he does that! One more thing... don't flip the burgers frequently; just one time only. Be kind to your burgers and they will turn out wonderful! I absolutely hate dry burgers! Don't you?


I made the basic recipe for my burgers, but I did top it off with a tablespoon of Guy's Smokey Garlic BBQ sauce. This is one of my favorite sugar free BBQ sauce that I get from www.Netrition.com. I use it a lot on grilled chicken or hamburgers. Guy's BBQ sauce comes in 4 flavors: Original, Smokey Bacon, Smokey Garlic and Spicy. I have tried all 4 and all of them are excellent!


A very close second is G Hughes Smokehouse Sugar Free Hickory BBQ sauce, which you can find at Wal-mart. They also come in 4 flavors: Maple Brown, Original, Hickory, and Honey. I have only tried 2 out of the 4 flavors which were Hickory and Maple Brown. The Hickory was pretty darn good, but their Maple Brown BBQ sauce? Blech... I had to toss it. It did not taste like Maple at all. I just didn't enjoy it and I won't be getting it again. Everyone has their own opinions and different taste buds so if you try it, let me know what you think of it!


The Perfect Burger
Slightly adapted from www.Food.com

Ingredients:
1 1/2 lbs 93% lean ground beef
1 egg
1 tsp prepared mustard (1/3 Condiment)
1 tsp worcestershire sauce (2 Condiments)
1/4 tsp garlic powder (1/2 Condiment)
1/4 tsp onion powder (1/2 Condiment)
1/2 tsp salt (2 Condiments)
1/2 tsp black pepper (1 Condiment)

Directions:
Lightly oil the grill and heat the grill to medium.
Whisk egg with next five ingredients in a medium bowl.
Crumble in beef and use your hands or a fork to gently mix together.
Handle the meat as little as possible. 
The more you work it, the tougher it gets.
Gently shape (don't firmly press) mixture into burgers about 3/4 inch thick.
Using your thumb, make a shallow depression in the center of each burger 
to prevent puffing up during cooking.
Place burgers on the grill and close the lid. 
Grill until no longer pink inside, turning once, about 6 to 8 minutes per side.
An instant read thermometer should read 160 F.
Don't abuse your burger by pressing with a spatula, 
pricking with a fork, or turning frequently as precious juices will be lost!

4 Servings with 1 Lean and 1.5 Condiments per serving


I try my best to come up with new and exciting recipes so you will not get bored with the same old recipes such as grilled chicken salad. Don't get me wrong... I love a great grilled chicken salad, but sometimes you need a little bit of variety. I could not stay on track if I only had grilled chicken salad everyday.

So... 

I was craving a yummy sweet treat that fits the 5 and 1 plan, but still left some room to have a yummy Lean and Green as well. This truly hit the spot! A delicious dessert to enjoy after a hearty Lean and Green meal.

Jicama is juicy, crunchy, nutty and slightly sweet. It's flavor reminds me of chowing down on a savory apple. I decided to try it as a fruit salad, although it really isn't a fruit at all. It's actually a root veggie. It still makes a great substitute for a delicious caramel apple salad using lower carb jicama instead. It turned out pretty darn good!


Look at that yummy goodness! Topped with toasted walnuts!


This dessert had all the yummy flavors of a caramel apple salad, but without all the carbs.


Jicama is quickly becoming a favorite veggie of mine. Being only 25 calories and providing 3 grams of fiber per half cup, I think I am in love!

You do need to cut the tough brown skin off with a sharp knife. Don't use a vegetable peeler since the skin is thick and tough. You will get better and safer results using a chef knife or you can purchase it pre-cut at Trader Joes!


Trim a slice off the top and the bottom so that the jicama is sitting on a flat surface. This makes it safer and sturdier for cutting away the skin. Once you remove the skin, chop the jicama into 1 inch pieces.


Place jicama in a medium sized bowl and add plain Greek yogurt. The yogurt gives this salad it's creamy goodness! Then add vanilla extract and ground cinnamon to the mixture. I used Sinful Cinnamon Blend from Stacey Hawkins. I absolutely love her seasoning blends! Check it out over HERE!


Add stevia or your favorite brand of sweetener. I like to use the packets of NuStevia which I get from Amazon. Click HERE for the link.


Next add a tbsp of Walden Farms caramel syrup.


Then stir in the toasted walnuts. Don't skip the toasting! Toasting the walnuts really brings out the flavor of the nuts. It gives them a richer and deeper flavor.


Pour the mixture into a small casserole dish. Drizzle with 2 tbsp of caramel syrup and sprinkle toasted walnuts on top. 


Lastly, sprinkle coarse sea salt on top and enjoy this guilt free dessert!


Salted Caramel Jicama Salad

Ingredients:
3 cups raw jicama, peeled and chopped (6 Greens)
3 containers (5.3 oz each) Chobani Zero Sugar Yogurt  or 1 1/2 cups 2% plain Fage Greek yogurt (1 Leaner)
1/2 tsp vanilla extract (1/2 Condiment)
1/2 tsp ground cinnamon (1 Condiment)
1 packet stevia (1 Condiment)
3 tbsp Walden Farms caramel syrup, divided (1 1/2 Condiments)
1/2 tsp coarse sea salt (2 Condiments)
28 walnut halves (4 Snacks)

Directions:
Toast walnut halves:
Preheat oven to 350 degrees. Line a baking sheet with foil for easy clean up. Spread walnut on prepared baking sheet in a single layer. Roast for 5 to 10 minutes. Frequently stir the nuts to ensure even baking. Nuts are done when they appear a shade darker and smell toasted. Let cool and then chop. Set aside.

Combine chopped jicama, yogurt, vanilla extract, cinnamon, stevia, 1 tbsp caramel syrup and half of the chopped walnuts in a medium bowl. Stir until jicama is evenly coated.


Pour into a serving dish. Drizzle 2 tbsp caramel syrup on top and then top with the other half of walnuts. Sprinkle sea salt on top. 
Serve immediately.

Makes 4 Servings
Each serving provides
1/4 Leaner, 1 1/2 Greens, 1 1/2 Condiments and 1 Optional Snack

Add 3/4 Lean option and 1 1/2 Greens to make a complete Lean and Green meal 

Examples:
4.5 oz grilled chicken breasts (3/4 Leaner) with 2 tbsp light Italian salad dressing as a marinade (1 Healthy Fat) and 3/4 cup broccoli (1 1/2 Greens)

5.25 oz cooked shrimp (3/4 Leanest) with 1 1/2 cups mixed greens (1 1/2 Greens), 2 tbsp light ranch dressing (1 Healthy Fat) and 1.5 oz avocado (1 Healthy Fat)

Click Here to Print

Now that the New Year is here, some of you have already started working on your resolutions!

I know I have!

If one of your New Year resolutions is to lose weight or have a healthier body, but you just don't know where to start... check out Stacey Hawkins One Day Flavor Fix Systems. There are three different systems to choose from depending on how many different seasonings, condiments, pantry staples and other products you want.

Click HERE if you would like to purchase!

The variety of flavors help make your meals taste better without forcing you to get bored of the same old seasonings. I remember when I first started cooking... many, many years ago :), I used to use ordinary salt, pepper, and garlic powder and that was it. Then I started playing around with other spices and seasonings and learned that you can come up with soooo many great tasting meals with just some added spice! Well... Stacey has already come up with delicious flavor combination so that you don't have to! Some of the flavor blends are Italian, Skinny Scampi, Southwestern, Ranch, Cinnamon Chipotle etc, depending on what type of system you choose.

With her guides, variety of products, and easy recipes... meal planning and prepping just got easier!

I absolutely love her products and I use them daily! If I didn't enjoy them, I wouldn't be using them in my recipes. I really love the variety of flavor combinations and how easy my meals come together when I don't have enough time, especially with two young boys!

What do you get with each system?

All of the systems include the Complete Kitchen Toolkit:

Quick Start Guide
Link to Welcome Video with personalized instruction and advice
Kitchen Basics Card
Menu Planner
Recipe Booklet with a dozen approved recipes
Basic Principles of Healthy Cooking Guide

and what each system includes is listed below!


Basic Flavor Fix System


This kit includes the Complete Kitchen Toolkit PLUS:

Spices and Seasonings:
Garlic Gusto
Citrus Dill
Viva Italiano
Sinful Cinnamon

Condiments and Pantry Staples:
Roasted Garlic Oil
Balsamic Mosto Cotto


Deluxe Flavor Fix System


This kit includes the Complete Kitchen Toolkit PLUS:

Spices and Seasonings:
Garlic Gusto
Citrus Dill
Viva Italiano
Sinful Cinnamon

plus
Tuscan Fantasy
Southwestern Seasoning
Skinny Scampi
Classic Chicken

Condiments and Pantry Staples:
Roasted Garlic Oil
Balsamic Mosto Cotto

plus
Luscious Lemon Oil

Bonus Materials:
Guide to the well-stocked pantry
Guide to the Well-stocked Fridge
Guide to the Well-Stocked Freezer
Stacey's signature how to guide "Low Carb Living and Loving it!


Ultimate Flavor Fix System


This kit includes the Complete Kitchen Toolkit PLUS:

Spices and Seasonings:
Garlic Gusto
Citrus Dill
Viva Italiano
Sinful Cinnamon
Tuscan Fantasy
Southwestern Seasoning
Skinny Scampi
Classic Chicken

plus
Cinnamon Chipotle
Garlic and Spring Onion
Dash of Desperation
Rockin Ranch

Condiments and Pantry Staples:
Roasted Garlic Oil
Balsamic Mosto Cotto

plus
Luscious Lemon Oil

Bonus Materials:
Guide to the well-stocked pantry
Guide to the Well-stocked Fridge
Guide to the Well-Stocked Freezer
Stacey's signature how to guide "Low Carb Living and Loving it!

plus
Stacey's signature booklet 
"From Bland to Wow - the secret to perfectly seasoned meals every time"


So if meal planning stresses you out and you are tired of eating the same old thing, give one of these systems a shot! Or take a look at some of her seasoning blends, flavored oils, cookbooks and other products. Stacey also has a  Lean and Green Low Carb Cookbook with 125 recipes discounted to $25 if you purchase it with one of the systems!

Check it out over HERE!

Powered by Blogger.