Sandy's Kitchen: Desserts

Showing posts with label Desserts. Show all posts
The HOT HOT months have already arrived in Vegas and I just want a delicious, cool, refreshing dessert that my entire family will love! Well by golly... I think I found it!


This is a decadent dessert that tastes similar to swiss almond chocolate ice cream! It has creamy ricotta cheese with sliced almonds and a subtle hint of chocolate. It is soooo soooo delicious! The best part is that it counts as half a Lean so you can indulge in this yummy treat after the rest of your Lean and Green Meal! Dessert anyone? Yes, please!


Using a few ingredients, makes this so easy to make! Plus there is no cooking involved! Just mix ricotta cheese, unsweetened cocoa, vanilla extract, and stevia together in a small bowl.


Top with sliced almonds and then chill for an hour!


A spoonful of yumminess! I absolutely love the crunch of the almonds combined with the smoothness of  the blended ricotta. Try it! You won't be disappointed!

Feel free to leave out the unsweetened cocoa powder and add different flavored extracts. For instance, I also love to switch out the vanilla extract and add lemon extract with grated lemon peel. A wonderful lemon taste for summer! Leave a comment and tell me what your favorite concoction is!


Heavenly Ricotta Chocolate Almond Mousse

Ingredients:
1/2 cup part-skim ricotta cheese (1/2 Lean)
1 tsp unsweetened cocoa powder (1 Condiment)
1/4 tsp pure vanilla extract (1/4 Condiment)
1/2 packet stevia or sweetener of choice (1 g carbohydrate or less per packet), or to taste (1/2 Condiment)
1/3 ounce almonds, sliced (1 Healthy Fat)

Directions:
In a small bowl, whisk all ingredients together except almonds.
You could also use an immersion blender to make it smoother and creamier.
Pour into a small ramekin and top with sliced almonds.
Cover and chill in refrigerator for at least an hour before serving.

1 Serving
1/2 Lean, 1.75 Condiments and 1 Healthy Fat


I try my best to come up with new and exciting recipes so you will not get bored with the same old recipes such as grilled chicken salad. Don't get me wrong... I love a great grilled chicken salad, but sometimes you need a little bit of variety. I could not stay on track if I only had grilled chicken salad everyday.

So... 

I was craving a yummy sweet treat that fits the 5 and 1 plan, but still left some room to have a yummy Lean and Green as well. This truly hit the spot! A delicious dessert to enjoy after a hearty Lean and Green meal.

Jicama is juicy, crunchy, nutty and slightly sweet. It's flavor reminds me of chowing down on a savory apple. I decided to try it as a fruit salad, although it really isn't a fruit at all. It's actually a root veggie. It still makes a great substitute for a delicious caramel apple salad using lower carb jicama instead. It turned out pretty darn good!


Look at that yummy goodness! Topped with toasted walnuts!


This dessert had all the yummy flavors of a caramel apple salad, but without all the carbs.


Jicama is quickly becoming a favorite veggie of mine. Being only 25 calories and providing 3 grams of fiber per half cup, I think I am in love!

You do need to cut the tough brown skin off with a sharp knife. Don't use a vegetable peeler since the skin is thick and tough. You will get better and safer results using a chef knife or you can purchase it pre-cut at Trader Joes!


Trim a slice off the top and the bottom so that the jicama is sitting on a flat surface. This makes it safer and sturdier for cutting away the skin. Once you remove the skin, chop the jicama into 1 inch pieces.


Place jicama in a medium sized bowl and add plain Greek yogurt. The yogurt gives this salad it's creamy goodness! Then add vanilla extract and ground cinnamon to the mixture. I used Sinful Cinnamon Blend from Stacey Hawkins. I absolutely love her seasoning blends! Check it out over HERE!


Add stevia or your favorite brand of sweetener. I like to use the packets of NuStevia which I get from Amazon. Click HERE for the link.


Next add a tbsp of Walden Farms caramel syrup.


Then stir in the toasted walnuts. Don't skip the toasting! Toasting the walnuts really brings out the flavor of the nuts. It gives them a richer and deeper flavor.


Pour the mixture into a small casserole dish. Drizzle with 2 tbsp of caramel syrup and sprinkle toasted walnuts on top. 


Lastly, sprinkle coarse sea salt on top and enjoy this guilt free dessert!


Salted Caramel Jicama Salad

Ingredients:
3 cups raw jicama, peeled and chopped (6 Greens)
3 containers (5.3 oz each) Chobani Zero Sugar Yogurt  or 1 1/2 cups 2% plain Fage Greek yogurt (1 Leaner)
1/2 tsp vanilla extract (1/2 Condiment)
1/2 tsp ground cinnamon (1 Condiment)
1 packet stevia (1 Condiment)
3 tbsp Walden Farms caramel syrup, divided (1 1/2 Condiments)
1/2 tsp coarse sea salt (2 Condiments)
28 walnut halves (4 Snacks)

Directions:
Toast walnut halves:
Preheat oven to 350 degrees. Line a baking sheet with foil for easy clean up. Spread walnut on prepared baking sheet in a single layer. Roast for 5 to 10 minutes. Frequently stir the nuts to ensure even baking. Nuts are done when they appear a shade darker and smell toasted. Let cool and then chop. Set aside.

Combine chopped jicama, yogurt, vanilla extract, cinnamon, stevia, 1 tbsp caramel syrup and half of the chopped walnuts in a medium bowl. Stir until jicama is evenly coated.


Pour into a serving dish. Drizzle 2 tbsp caramel syrup on top and then top with the other half of walnuts. Sprinkle sea salt on top. 
Serve immediately.

Makes 4 Servings
Each serving provides
1/4 Leaner, 1 1/2 Greens, 1 1/2 Condiments and 1 Optional Snack

Add 3/4 Lean option and 1 1/2 Greens to make a complete Lean and Green meal 

Examples:
4.5 oz grilled chicken breasts (3/4 Leaner) with 2 tbsp light Italian salad dressing as a marinade (1 Healthy Fat) and 3/4 cup broccoli (1 1/2 Greens)

5.25 oz cooked shrimp (3/4 Leanest) with 1 1/2 cups mixed greens (1 1/2 Greens), 2 tbsp light ranch dressing (1 Healthy Fat) and 1.5 oz avocado (1 Healthy Fat)

Click Here to Print

I am fairly new to kabocha squash but man oh man... where has it been all my life? I have absolutely fallen in love with it! It tastes quite similar to butternut squash, pumpkin and sweet potatoes but with less carbs!


Kabocha squash is an Asian winter squash commonly known as Japanese pumpkins. It is slightly sweeter than butternut squash, but it has a less calories and carbs. One cup is only 40 calories and 7 grams of carbs! A great veggie for the low carb lovers or those trying to watch their waistline! Not to mention it has lots of beta carotene, iron and vitamins! The taste and texture is a combination of  both pumpkin and sweet potato. Pretty awesome marriage of flavors going on! That is why this squash makes a wonderful substitute for "pumpkin" pie and it works so well for the recipe below.


But wait... where do I find this yummy tasting veggie? I had no problems finding it at my local Trader Joes. They had tons for $2.29 each! I have also heard that they can also be found at local Asian markets (sometimes year round) and local farmers markets. Again, I am fairly new to this squash so I haven't really been searching a long time for it and I am lucky to have a Trader Joes by me.

They are usually available in late Summer to early Fall and can be stored in a cool dry place up to one month. You can extend the life of the squash by freezing it. Check out this site for Ways to Freeze Winter Squash. Try to use plain frozen kabocha squash within 3 months.


The outer layer of kabocha squash can be really tough to cut through. Microwave the squash for about a minute or two to soften it up some. Use a large sharp knife to cut the squash in half. You are really going to have to work at it to get that sucker open. It may help to cut the stem off at the top and then slice through the squash. 


Scoop out all the seeds and guts with a spoon. Guts just sound so appropriate with Halloween coming up, doesn't it?  :) 


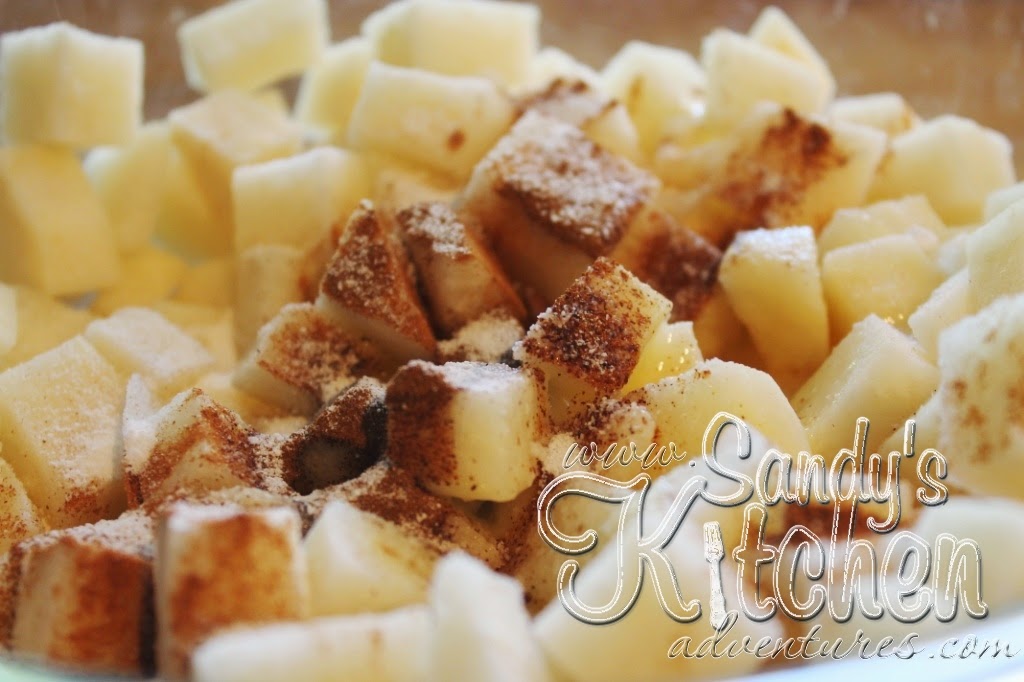
Cut the squash into wedges. You can leave it as wedges, but I took it a step further and cut the wedges in half. Also, you can cut or peel the skin off before baking, but I chose to do it after baking since it was easier. Place the pieces on a baking sheet lined with non-stick foil. Spray non-stick cooking spray on the squash. I used coconut non-stick cooking spray, but whatever kind will do. Roast the squash for about 30 minutes and then flip the squash over and roast for another 15 minutes or until softened. Let cool.


Once cooled, cut or peel the skin away from the wedges and put the squash in a bowl. Measure out 2 cups for this recipe and store the rest. Add the 2 cups of squash to a blender. Then add all the other ingredients except the walnuts because those are for the topping.


Some people have asked me my sweetened of choice. I love these little packets of stevia that I get from Amazon. There is no bitter aftertaste! We can all appreciate that!


Once you have all your ingredients in the blender, blend until it is nice and smooth. If you need to add a little bit more unsweetened almond or cashew milk, please do so. I found 1/4 cup to be enough but some may like their pies to be a little less dense.


Spray four ramekins with non-stick cooking spray. Evenly distribute the mixture into the ramekins. Bake at 425 degrees for 15 minutes.


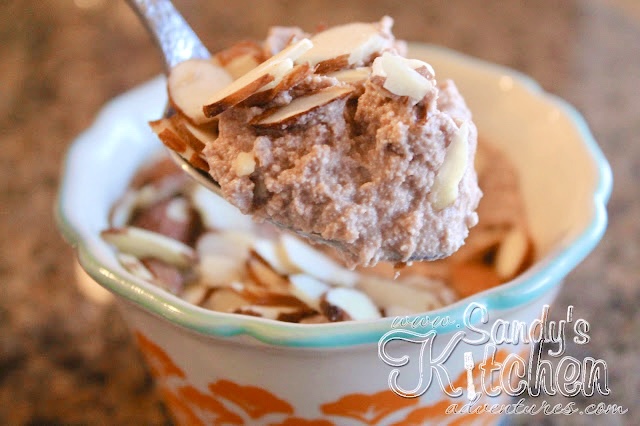
Reduce the temperature to 350 degrees. Remove the pies from the oven and add the walnuts. This is only an option of course. Seven walnut halves count as one optional snack, but I will tell you this... don't skimp on the nuts! The walnuts get toasted right on the pies and their natural flavors are enhanced. It takes the place of a traditional pie crust, except it is on top of course, and you really just won't miss it. Not to mention walnuts are the only nut with a significant source of plant-based, heart healthy omega-3 fats. If you like, make one or two pies with the nuts and leave the nuts off on the others.


Let the pies cool and add a little bit of fat free reddi whip and a sprinkle of ground cinnamon, if desired.


A heavenly dessert just in time for the holidays! Trust me when I say your house will smell like Fall when baking these desserts! Who needs pumpkin pie when I have this healthier version? I know I don't! Enjoy!


Baked Kabocha or 
Crustless "Pumpkin" Pie

Ingredients:
2 cups roasted kabocha squash (4 Greens)
1/4 cup unsweetened cashew or almond milk (1/4 Condiment)
2 egg whites
1/2 tsp ground cinnamon (1 Condiment)
1/2 tsp pumpkin pie spice (1 Condiment)
1/2 tsp maple or vanilla extract (1/2 Condiment)
1 packet NuStevia (1 Condiment)
28 Walnut halves (4 Snacks)

Directions:
Prepare kabocha:
Preheat oven to 400 degrees. Line a baking pan with non-stick foil. If the skin is too tough to cut, place kabocha in the microwave for 1 to 2 minutes. Cut the squash in half.

Spoon out all the seeds. You can cut or peel the skin off before baking, but I found it easier to peel after baking. Do whatever you prefer. Cut the squash into wedges. Lay the wedges on the prepared pan. Spray the wedges with non-stick cooking spray. Bake for 30 minutes. Flip the squash over. Spray with cooking spray. Bake for 10 to 15 minutes or until it is cooked.
Let cool. 

Once cooled, peel or cut off the skin with a knife. Normally I eat the skin when roasting but for this particular recipe, I like to remove the skin for a smoother richer taste.

Measure out 2 cups of cooked squash, without the skin. Use the rest of the squash for another time.

To make pies:


Preheat oven to 425 degrees. Spray 4 ramekins with non-stick cooking spray.  Add 2 cups of squash, without the skin, and the rest of the ingredients, except walnuts to the blender. Blend until smooth. Pour mixture into ramekins. Bake for 15 minutes. 

Reduce heat to 350 degrees. Remove ramekins from oven and evenly distribute the walnuts on top of each ramekin. Bake for an additional 25 minutes.

Makes 4 Servings
Each Serving provides
1 Green, 1 Condiment and 1 Optional Snack


Just in time for Fall! 

Something about the smell of cinnamon and baked apples cooking in the oven during the Fall season brings back such wonderful memories from my favorite season!


Have you ever tried jicama? They are a white fibrous root vegetable native to Mexico, but you can find them in all of the grocery stores here. In my opinion, it is a cross between a carrot and an apple. Delicious eaten raw or cooked! Great thrown into salads! They can be wonderful substitutes for apples because they are subtly sweet, crisp and crunchy. The only difference you may notice is that they don't get really soft like apples when baking, but  they taste pretty darn good.


I peeled and cubed the jicama in very small pieces (like how you would cube potatoes for hash browns), but you can also slice them really thin like apple slices. You want to make the pieces small or thin so they cook easier and faster. 


Add some cinnamon, apple pie spice and stevia along with the melted butter. If you do not have apple pie spice, it is okay. You can always double up on the cinnamon or add more cinnamon with a touch of nutmeg and allspice.


Get it all the pieces of jicama evenly coated with the spices and butter.


Spread the pieces over a foil lined baking pan.


Cover with foil and bake for 20 minutes. Then uncover and bake for 15 more minutes.


I made three 1 cup servings, but you could always have only 1/2 a cup as 1 Green and have other veggies as your other Greens so that this could be a little dessert with dinner. I hope you enjoy it as much as me! Delicious!


Baked Cinnamon Jicama (Apples)

Ingredients:
3 cups jicama peeled and cubed or sliced thin (6 Greens)
3 tbsp light Land O' Lakes Butter with Canola Oil, melted (3 Healthy Fats)
1/4 tsp apple pie spice (1/2 Condiment)
1/4 tsp ground cinnamon (1/2 Condiment)
3 packets stevia in the raw (3 Condiments)

Optional Toppings:
2 tbsp Walden Farms caramel syrup (1 Condiment)
2 tbsp Fat Free Reddi Whip (1 Condiment)

Directions:
Preheat oven to 350 degrees. Line a cookie sheet or baking pan with non-stick foil.

Mix jicama with melted butter in a medium sized bowl. Add cinnamon, apple pie spice, and stevia stirring until combined. Pour onto a foil lined pan. Cover with foil. Bake for 20 minutes. Uncover and bake an additional 15 minutes.

The jicama will not get completely soft when baking. Expect to have a slight crisp center when eating and a slightly sweetened taste. Enjoy!

3 (1 cup) servings

Per Serving:
2 Greens, 2 Condiments and 1 Healthy Fat
(still need 1 more Green)


You guys are not going to believe what is used in this dessert instead of coconut! Spaghetti squash! I questioned how spaghetti squash could replace coconut but it works and it’s delicious! It has the crunchiness and sweet flavor similar to coconut. It definitely can pass as coconut pie! This Is a great way to use up a Green and a part of your Lean so you can  have a yummy dessert after your Lean and Green meal! Definitely will be making this again!  Enjoy!


Mock Coconut Pie

Ingredients:
3 packets stevia (3 Condiments)
1 egg (1/3 Lean)
1 tbsp light butter, melted (1 Healthy Fat)
1 tsp lemon juice (1/2 Condiment)
1/4 tsp vanilla extract (1/4 Condiment)
1 cup cooked, shredded spaghetti squash (2 Greens)
1/4 tsp coconut extract (1/4 Condiment)
Dust of cinnamon

Directions:
Preheat oven to 350. Beat the stevia and egg together until light and frothy. Beat in lemon juice, vanilla and butter until well blended. Pulse the spaghetti squash in a blender a few times so that you get small strands that resemble coconut. Stir in spaghetti squash. Pour the mixture into two ramekins. Dust the top with cinnamon, if desired. Bake in preheated oven, until a knife inserted in center comes out clean 40 to 45 min. Cool on rack before serving.'

2 servings with 
1/6 Lean, 1 Green, 2 Condiments, and 1/2 Healthy Fat per serving


This is a very easy cheesecake to make. You just need to combine all the ingredients in a blender, pour into a small dish and bake! Not to mention this recipe is low carb because it is made from cottage cheese. This is a wonderful alternative to having a dessert as part of your lean or a way to get rid of your cottage cheese. It also tastes even better the next day when all the ingredients have really set together in the fridge! Enjoy!


Oma's Cheesecake

Ingredients:
1 cup 1% cottage cheese (2/3 Leanest Lean)
1 egg (1/3 Lean)
2 tsp lemon juice (1 Condiment)
1 tsp lemon zest (1/3 Condiment)
1 tsp vanilla extract (1 Condiment)
3 packets Stevia (3 Condiments)
1/8 tsp salt (1/2 Condiment)

Directions:
Preheat oven to 325. Blend all ingredients in blender. Pour into 2 ramekins. Bake 50 to 60 minutes or until center is set.  Let cool completely.

 2 Servings with 
1/2 Lean and 3 Condiments per Serving

Powered by Blogger.