These "fries" made from the Cali'flour Flat breads are so delicious! Who would've thought they would make awesome "fries"? I bet these would pair nicely with a yummy crisp lettuce wrap!

Serve these "fries" with 1 more Green and 2/3 Lean such as:

2 eggs
3.3 oz 93% ground beef or steak
4 oz of chicken breasts
4.6 oz shrimp, tilapia, or 99% ground turkey

I seasoned the "fries" with Weber Garlic Sriracha Seasoning and added a tbsp of reduced sugar ketchup on the side. So good! Give them a try!


Cali'flour Fries

Ingredients:
2 Cali'flour Flat breads (1/3 Lean, 2 Greens)
Optional: 1 tbsp reduced sugar ketchup (1 Condiment)

Directions:
Preheat oven to 400 degrees.
Pre bake the Cali'flour flat breads in the oven on a vented pizza pan, pizza screen, or on a nonstick cookie sheet lined with parchment paper for about 5 min.

Remove from oven and cut into strips to create fries. Season with spices of choice. Place back into oven and bake an additional 5 to 8 more min. Remove from oven and let cool for a few more min. Serve with ketchup.

1 Serving with
1/3 Lean, 2 Greens, and 1 Condiment (reduced sugar ketchup)


Roasted cherry tomatoes, mozzarella cheese, spaghetti squash, and fresh chopped basil make this dish a delicious refreshing meal! The muffin cups make this a fun twist on Caprese. You can easily make this into one larger casserole, but I thought it would be really cute to make little spaghetti squash nests using muffin cups. You know... with Spring being around the corner and all. Before putting the cheese over the tomatoes, my 6 year old leans over to tell me that the roasted cherry tomatoes look like eggs in a nest. By golly, yes you are right! There you go! Perfect for Spring!


Begin the recipe by preparing and cooking your spaghetti squash. You can prep your squash the day before! Cooked squash can lasts 3 to 5 days in the fridge. I included two ways in the recipe below, oven method or slow cooker method. I love roasting my spaghetti squash in the oven which brings out the subtle sweetness of the squash. Using your Instant Pot, air fryer, or microwave or other options as well. Choose your preferred cooking method and reserve 2 cups of spaghetti squash strands for this recipe. Save the rest for another use.


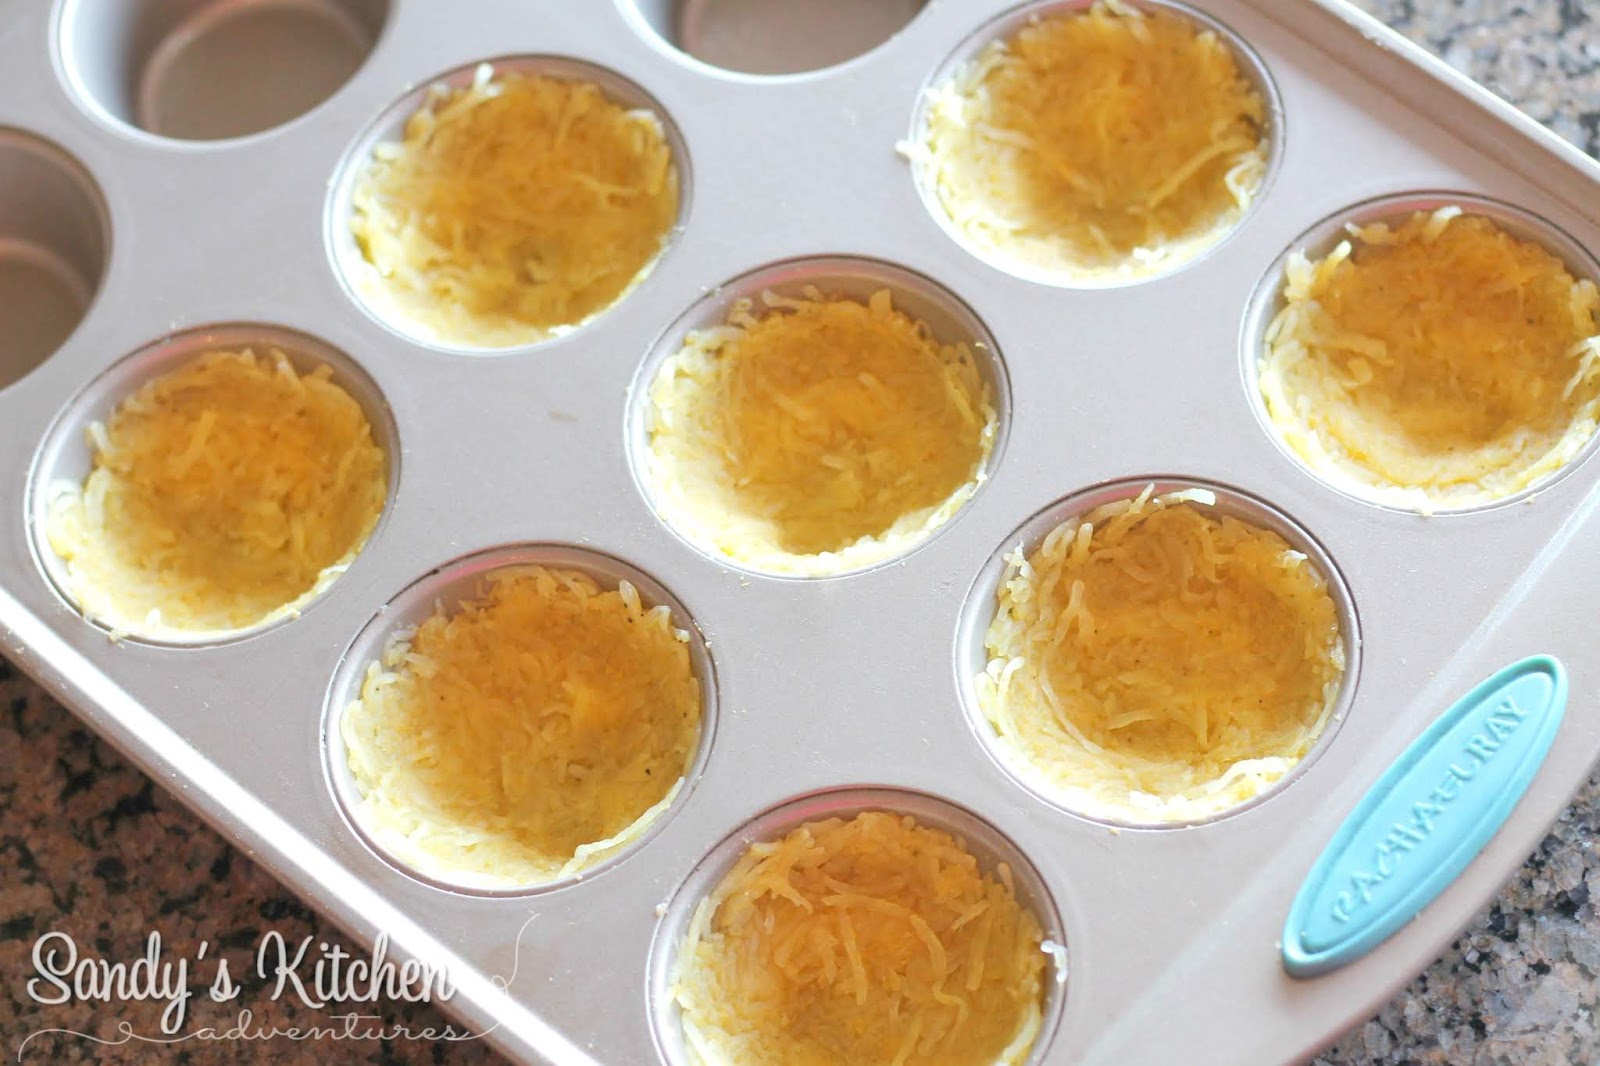
Mix 2 cups of spaghetti squash with salt, pepper, garlic powder, and 3 tbsp egg beaters. Scoop 1/4 cup of spaghetti squash into each muffin cup.


Press down on the bottoms and sides to create nests. Place in a preheated oven for 20 min.


Put cherry tomatoes on a baking sheet lined with non-stick foil or a silicone mat. Spray with non-stick cooking spray. Sprinkle with salt and pepper. Bake for 15 to 20 min. Save time by roasting them with the spaghetti squash nests.


Scoop roasted tomatoes into each cup. I had 24 cherry tomatoes so I put 3 in each cup. Top each cup with 2 tbsp mozzarella cheese . Bake for an additional 8 to 10 min or until cheese has melted.


Garnish with chopped fresh basil. You can enjoy 4 of these delicious nests with 1/2 a Lean more! I served these with 3 oz of rotisserie style chicken breast meat (bones and skin removed) I picked up from the grocery store. So yummy!


Caprese Spaghetti Squash Nests

Ingredients:
For the Nests:
1 medium spaghetti squash ~ 
reserve 2 cups cooked for recipe (4 Greens)
1/4 tsp salt (1 Condiment)
1/4 tsp black pepper (1/2 Condiment)
1/4 tsp garlic powder (1/2 Condiment)
3 tbsp liquid egg whites (1 Condiment)

For the Filling:
1 cup cherry tomatoes ~ about 5.26 oz (2 Greens)
1/4 tsp salt (1 Condiment)
1/4 tsp black pepper (1/2 Condiment)
4 oz reduced fat mozzarella cheese, shredded (1 Lean)
1/4 cup basil, chopped (1/2 Condiment)

Directions:
Oven Method for Spaghetti Squash
Preheat oven to 375. Wash spaghetti squash.
With a sharp knife, slice spaghetti squash in half lengthwise. If the squash is too hard to cut, puncture several holes around the spaghetti squash and microwave for 3 to 5 min to soften a little. Let cool before cutting in half. Scoop out the seeds and stringy flesh. Spray lightly with cooking spray. Place squash cut side down. Bake for 40 to 45 min. Let cool. Shred the flesh into noodles with a fork. Reserve 2 cups for recipe.

Slow Cooker Method for Spaghetti Squash
Wash spaghetti squash. Puncture several holes around the spaghetti squash. Place the whole spaghetti squash in the slow cooker with 1 cup water. For a 3 to 4 lb medium squash cook on LOW for 5 to 6 hours or 3 to 4 hours on HIGH. Let cool for about 15 to 30 min before slicing in half. Scoop out seeds. Shred the flesh into noodles with a fork. Reserve 2 cups for recipe.

To Make Spaghetti Squash Nests and Roasted Tomatoes
Preheat oven to 400. 
Spray a muffin pan with non-stick cooking spray.
In a medium sized bowl, combine spaghetti squash, salt, pepper, garlic powder, and liquid egg whites. Transfer 1/4 cup spaghetti squash to each muffin cup, pressing down on the bottoms and sides to form nests. Place in the preheated oven and bake 18 to 20 min.

Line a baking sheet with non-stick foil or a silicone mat. Spread tomatoes on baking sheet. Spray with non-stick cooking spray. Add salt and pepper. Bake for 15 to 20 min until tomatoes are soft. These can be put in the oven the same time as the spaghetti squash nests since they cook at the same temperature.

Scoop roasted tomatoes in each cup. Sprinkle 2 tbsp of cheese per cup. Bake for an additional 8 to 10 min or until cheese has melted. Let cool for a few min. Carefully scrape around the edges of each nest with a butter knife and remove from the tin. Place on a serving platter. Sprinkle with fresh basil.

2 Servings with
1/2 Lean, 3 Greens, and 2.5 Condiments per serving (4 Nests)

Serve with an additional 1/2 Lean such as: 
2.5 oz 93% lean ground beef or steak
3 oz chicken breasts or 3 oz Jennie-O Sweet Italian turkey sausage (need 1/2 Healthy Fat)
3.5 oz shrimp, tilapia or 99% lean ground turkey (need 1 Healthy Fat)

Slightly adapted from:

Tasty


Looking for a yummy shake to enjoy on St. Patty's Day? Try this green shake! Baby spinach gives this shake it's nice green color without any added food coloring. I like to use baby spinach instead of regular spinach for shakes because it has a milder sweeter taste than regular spinach. What is great is that spinach is a super food with loads of nutrients, tons of health benefits, and only 7 calories for 1 cup! Just remember to subtract from your 3 Greens for the day! Adding spinach to your shakes is a great way to sneak your veggies in if you are having a hard time eating them all at once!


The sugar free pistachio pudding is for added flavor. I love pistachios and I thought the color would be fitting for St. Patty's Day! I added 2 tbsp Reddi Whip for an additional Condiment, but you can definitely leave it out. Enjoy!


Pistachio Shake

Ingredients:
1 French Vanilla Shake (1 Fueling)
1 1/2 tsp Sugar free pistachio pudding (1 1/2 Condiments)
1 cup baby spinach (1 Green)
1/2 cup unsweetened cashew milk (1/2 Condiment)
1/2 cup water
ice

Directions:
Blend all ingredients in a blender until well blended. Serve.

1 Serving with
1 Fueling, 1 Green, and 2 Condiments


These Chicken Fajita Flat Breads are another great way to enjoy the Cali'flour Foods Flat BreadsI love using them as soft taco shells and filling them up with my favorite fillings! Chicken seasoned with fajita seasoning and topped with sweet bell peppers that are cooked in the air fryer are delicious! Add a little bit of sour cream, salsa and avocado and you have a quick and delicious meal! Plus you don't have to spend hours in the kitchen! Enjoy this simple recipe!

These flat breads count as 1/3 Lean and 2 Greens on our program! Add 1/3 Lean and 1 Green more and you have a complete Lean and Green meal! Each flat bread is only 70 Calories, 3 g of Carbs (2 g Net), and 6 g of Protein! They are made with only a few clean ingredients which are cauliflower, egg whites, and mozzarella cheese so they are grain free and gluten free! Yes!!!

When ordering these flat breads or pre-made Cali'lite crusts (1/2 Lean, 3 Greens for the entire crust), use Code SANDY to save 10% off your entire order over $50!


Chicken Fajita Flat Breads

Ingredients:
2 Cali'flour Foods Flat Breads (1/3 Lean, 2 Greens)
5.5 oz raw chicken breasts, chopped ~ should yield 4 oz cooked* (2/3 Lean)
1/2 cup roasted bell peppers, sliced (1 Green)
1/2 tsp fajita seasoning (1 Condiment)
1 tbsp sour cream, divided (1 Condiment)
1 tbsp salsa, divided (1 Condiment)
1 oz avocado, divided (2/3 Healthy Fat)

Directions:
Preheat oven to 400 degrees.
Place flat bread on a pizza screen or on a baking sheet lined with parchment paper. Bake for 12 to 14 min. Switch the oven to broil and broil for a few min or until golden brown. Let cool for 10 min.

Spray a non-stick skillet with cooking spray. Heat over medium high heat. Add chicken and fajita seasoning. Continue cooking chicken for about 3 to 4 min or no longer pink. Place 2 oz of chicken, 1/4 cup roasted peppers, 1/2 tbsp sour cream, 1/2 tbsp salsa, and 1/2 oz avocado on each flat bread. Enjoy!

1 Serving with
1 Lean, 3 Greens, 3 Condiments, and 2/3 Healthy Fat per serving

*If you would like to add 1/3 cup reduced fat, decrease the chicken to 2 oz (1 oz per flat bread) and skip the avocado.


This recipe is so easy to make! Your family will love this healthier low carb version of chicken broccoli and rice casserole! Perfect for a quick weeknight meal! Using steamable bags of cauliflower rice and broccoli makes prepping this meal a cinch! Pick up a whole rotisserie chicken from your local grocery store, remove the skin and bones, and chop up the breast meat to save time if you are in a hurry! This is a slightly adapted version that Brittany Hanson Luder shared with me! Thank you Brittany!


Begin by microwaving the frozen cauliflower rice and broccoli florets following the directions on the back of the packages. Measure out the appropriate amounts needed and place in a large bowl. 


Add chopped chicken, 3/4 cup cheese, reduced fat alfredo sauce and grated parmesan cheese. I used mozzarella cheese but cheddar cheese would be yummy too! Stir until everything is combined. 


Pour mixture into a 13" x 9" casserole dish and spread evenly.


Top with remaining 1/4 cup of cheese and bake for about 15 to 20 min or until cheese has melted and casserole is warm.


Divide into 3 portions. You can have 1/3 of this casserole! Make sure you are hungry! It is a lot of food!


This casserole dish did not disappoint and is literally ready in less than 30 min! Comfort food at it's best!


Chicken Broccoli Rice Casserole

Ingredients:
3 cups steamable bag of cauliflower rice (6 Greens)
1 1/2 cups steamable bag of broccoli, chopped (3 Greens)
12 oz cooked chicken, chopped* (2 Leaner)
1 cup reduced fat cheese of choice, divided (1 Lean)
2 tbsp Kraft reduced fat parmesan cheese (1 Condiment)

Directions:
Preheat oven to 350 degrees.
Lightly spray a 13" x 9" casserole dish and set aside.
Steam cauliflower and broccoli in the microwave following the directions on the back of the packages. Measure out 3 cups cauliflower rice and 1 1/2 cups of broccoli and place in a large bowl. Add cooked chicken, 3/4 cup cheese, alfredo sauce and parmesan cheese. Stir until combined.
Pour mixture in prepared casserole dish and top with remaining 1/4 cup of cheese. Bake in oven for about 15 to 20 min or until cheese is melted and casserole is warm. Divide into 3 equal portions. Enjoy!

3 Servings with
1 Lean, 3 Greens, and 3 Condiments per serving

*Use the breast meat from a rotisserie chicken found at your local grocery store to save time! They are already seasoned and cooked for you so no need to add additional spices.


Italian Beef Stuffed Peppers are an easy healthy recipe the entire family will love! Bell peppers are filled with a hearty meat mixture boasting Italian flavors and then topped with melted mozzarella cheese!


Start off by pre-cooking your peppers unless you like your peppers crunchy. I baked my pepper halves for about 15 min, but you can also place them in boiling water for 3 to 5 min or use the microwave to soften them up a bit.


Brown the ground beef, then add seasonings and parmesan cheese. Stir in marinara sauce at the end. Stuff the peppers with the meat filling. Cover the peppers with foil and bake 10 to 12 min. Remove foil, add mozzarella cheese and bake an additional 5 min or until cheese has melted. Enjoy!


Italian Beef Stuffed Peppers

Ingredients:
10.5 oz 93% lean ground beef, raw ~ need 7.5 oz cooked (1 1/2 Leans)
1 cup Great Value Italian diced tomatoes, blended (2 Greens) *
1/4 tsp garlic powder (1/2 Condiment)
1/4 tsp salt (1 Condiment)
1/4 tsp black pepper (1/2 Condiment)
1/2 tsp dried Italian seasoning (1 Condiment)
2 tbsp fresh parmesan cheese, grated (2 Condiments)
1/2 cup part skim mozzarella cheese, shredded (1/2 Lean)
2 bell peppers (4 Greens)

Directions:
Preheat oven to 375 degrees.
Remove top, seeds, and core from bell peppers. Rinse, pat dry and cut in half lengthwise. Place peppers on a baking sheet and bake 10 to 15 min or until peppers start to get soft.

Meanwhile, cook ground beef in a medium sized skillet over medium high heat. When beef is almost cooked through, add garlic powder, salt, pepper, Italian seasoning, and grated parmesan cheese. Continue cooking until meat is fully cooked. Stir in marinara sauce at the end. Set aside.

Scoop 1/4 of the meat mixture into each pepper half. Cover with foil and bake for 15 min. Remove foil and add 2 tbsp of cheese over each pepper half. Bake for an additional 5 min or until cheese has melted.

2 Servings with
1 Lean, 3 Greens, and 2.5 Condiments per serving (2 pepper halves)


* When choosing a brand of Italian diced tomatoes, make sure it has less than or equal to 5 g of carbs per 1/2 cup serving.


Taco Tuesday! 🌮 Quick and easy fish tacos for dinner! There are several ways to enjoy tacos on plan. You can make cheese shells which is simply melted cheese hardened into shells, smaller homemade cauliflower crusts, or various kinds of lettuce. I used romaine lettuce. The Vegetable Conversion Chart is helpful in determining how much Green is a serving size.

Romaine lettuce make perfect taco shells, but use any type of lettuce you like. I stuffed the lettuce with seasoned tilapia, air fried red cabbage, avocado or you can use sour cream, salsa ranch dressing and garnished with cilantro. If you want to add cheese,  use 5.25 oz of cooked fish (3/4 Lean) and add 1/4 cup reduced fat mozzarella cheese (1/4 Lean). So delicious! Enjoy!


Easy Fish Tacos

Ingredients:
20 oz raw tilapia ~ should yield 14 oz cooked (2 Leanest)
3/4 tsp salt (3 Condiments)
1/4 tsp black pepper (1/2 Condiment)
1/2 tsp ground cumin (1/2 Condiment)
1/2 tsp chili powder (1 Condiment)

Toppings:
2 tsp lime juice (1 Condiment)
4 tbsp approved dressing of choice (2 Healthy Fats)
3 oz avocado or you can use 4 tbsp sour cream (2 Healthy Fats)

Directions:
Preheat oven to 375 degrees. Line a baking sheet with parchment paper. Sprinkle salt, pepper, cumin and chili powder on both sides of tilapia. Bake for 20 to 25 min or until done.

Place each 7 oz portion of cooked fish on romaine lettuce to hold the fish. Drizzle each portion with 1 tsp lime juice and 2 tbsp of dressing. Then add your choice of 1.5 oz avocado or 2 tbsp sour cream per serving. Enjoy!

2 Servings with
1 Leanest, 3 Condiments, and 2 Healthy Fats per serving
*Subtract romaine lettuce from your Greens. 1.6 oz of romaine lettuce is 1 Green


While growing up in the South (Texas, Louisiana and Florida), I absolutely loved shrimp and grits! Cheesy grits topped with spicy Cajun shrimp! Good old-fashioned comfort food! Here is a healthier low carb version from Optavia using cauliflower!


This version uses riced cauliflower instead of stone-ground cornmeal, but don't worry! It still has the creamy texture we all love from the grits. Unsweetened almond milk, sour cream and cheese contributes to that! Easy enough for a busy weeknight dinner or tasty enough for company!


Start off by cooking your shrimp seasoned with Cajun seasoning in a medium sized skillet sprayed with cooking spray. Then add lemon juice and chicken broth. Let simmer for about a minute and set aside.


In another skillet, melt butter and cook riced cauliflower for about 5 minutes. Then add salt and unsweetened almond or cashew milk. Cook for an additional 5 minutes.


Add sour cream and shredded cheddar cheese. Stir until cheese is completely melted. Equally portion out the grits on two plates. Top grits with shrimp and sliced green onions. Enjoy this yummy Southern favorite!


Shrimp and Cauliflower Grits

Ingredients:
1 lb raw, peeled, deveined shrimp
1/2 tbsp Cajun seasoning
Cooking spray
1 tbsp lemon juice
1/4 cup chicken broth
1 tbsp butter
2 1/2 cups finely riced cauliflower
1/2 cup unsweetened original almond or cashew milk
1/4 tsp salt
2 tbsp sour cream
1/3 cup reduced fat shredded cheddar cheese
1/4 cup thinly sliced scallions

Directions:
Toss shrimp and Cajun seasoning together in a large bowl.
Spray a medium sized skillet with cooking spray, and heat over medium heat. Cook shrimp until pink, about 2 to 3 min per side. Add lemon juice and chicken broth, scraping any bits off of the bottom of the pan, and simmer for 1 minute, set aside.

In a separate skillet, heat butter over medium heat. Add riced cauliflower, and cook for 5 min. Add milk and salt, and cook for an additional 5 minutes.
Remove from heat, and stir in sour cream and cheese until melted.
Serve shrimp on top of cauliflower grits, and top with scallions.

2 Servings with
1 Leanest, 3 Greens, 3 Condiments and 2 Healthy Fats per serving

Original recipe from Optavia


These low carb taco cups just made Taco Tuesday even better! They are absolutely delicious and are made from cheese only! Super duper easy to make and very family friendly!


All you have to do is place sliced cheese on parchment paper and bake for about 6 to 7 min. Let cool for about a minute or two. Then carefully lift them off the parchment paper and put them into a muffin tin.


Let cool for about 10 min. Add your taco meat filling and all your favorite toppings!


I used Stacey Hawkins Southwestern Seasoning to season my ground beef, but feel free to use your favorite taco seasoning. 1/2 tsp of Stacey Hawkins Seasoning count as 1 Condiment.


This seasoning has a combination of chili powder, cumin, cilantro, red bell pepper, sundried tomatoes, cayenne, paprika, and natural seas salt. Gluten-free, sugar free and no preservatives! So yummy! 

Enjoy these On Plan taco cups the next time you are craving tacos! You won't be regret it!


Taco Cups

Ingredients:
4 oz raw 95 to 97% lean ground beef, 3 oz cooked (1/2 Lean)
1 tsp Stacey Hawkins Southwestern Seasoning or taco seasoning of choice (2 Condiments)

Additional Toppings:
Lettuce and tomatoes (subtract from your Greens) 
1 tbsp sour cream (1 Condiment)

Directions:
Preheat oven to 375 degrees.
Brown ground beef over medium high heat for about 5 min or until cooked thoroughly. Drain any excess fat.
Season with taco seasoning and stir until combined. Set aside.

Line a baking sheet with parchment paper.
Lay cheese slices on parchment paper and bake 6 to 7 min or until bubbly.
Let cool on the baking sheet for about 1 to 2 min.
Carefully pick up melted cheese slices and place on the bottom of a muffin tin.
Let cool for 10 min.
Place half the ground beef in one cup and the rest in the other cup.
Top with your desired toppings!

1 Serving with
1 Lean and 3 Condiments

*You can also use 1/2 cup shredded reduced fat cheddar cheese if you do not have cheese slices. Spread 1/4 cup cheese on parchment paper and form a circle. Repeat to form another circle.


Looking for another quick and easy side dish to serve during the BIG football game? These Buffalo Cauliflower Bites are a crowd pleaser for sure!


I used my Air Fryer to cook these up in less than 15 minutes, but you can also use the oven.Yummy munchies that every spice lover will enjoy! If you don't want it too spicy, decrease the hot sauce. Enjoy!


Buffalo Cauliflower Bites

Ingredients:
5 1/2 cup cauliflower florets, cooks down to 4 1/2 cups (9 Greens)
1/2 cup of Frank's buffalo hot sauce, divided (4 Condiments)
1/4 tsp garlic powder (1/2 Condiment)
6 tbsp light ranch or blue cheese dressing, divided (3 Healthy Fats)

Directions:
Add 1/4 cup Franks Buffalo Hot Sauce and garlic power to the cauliflower florets and toss to coat. Place a piece of parchment paper (not waxed paper) on the bottom of the air fryer for easy clean up or use cooking spray. Set the air fryer to 360 and cook for 12 to 15 minutes, shaking every 5 minutes. Place cooked cauliflower in a medium size bowl and add the remaining 1/4 cup of Frank's Buffalo Hot Sauce. Toss to coat. Serve each serving with 2 tbsp light ranch or blue cheese dressing!

* For the oven, cook for 20 min at 450 degrees stirring halfway through.

Makes 3 Servings (1 1/2 cups)
Each serving provides
3 Greens, 1 1/2 Condiments, and 1 Healthy Fat per Serving

Serve with a Leaner or Leanest Protein if using dressing


Powered by Blogger.