Looking for another way to eat those mashed potatoes?

These Garlic Potato Pancakes are delicious and make the mashed potato fueling even yummier and a little bit more exciting! They are slightly crispy on the outside, but still has the soft creamy texture of mashed potatoes on the inside.


I added 1/4 cup of reduced fat cheese, but it isn't necessary. I just happen to think cheese makes everything better! You could also add 1 tbsp of Kraft reduced fat grated parmesan cheese (1/2 Condiment) if you are looking to jazz it up without using your Lean. Both ways are delicious!

When you combine the ingredients, it will look runny. Don't worry! It will thicken up! Just let it sit for 5 minutes. Pour the mixture in the skillet and enjoy these yummy potato pancakes!


Garlic Potato Pancakes

Ingredients:
1 Garlic Mashed Potatoes (1 Fueling)
1/4 tsp baking powder (1/2 Condiment)
1/4 cup reduced fat cheese, optional (1/4 Lean)
1/2 cup water

Directions:
Combine mashed potatoes, baking powder, water and cheese.
Let stand for 5 minutes so mixture can thicken up.
Lightly spray a cast iron skillet with cooking spray.
Heat skillet over medium heat.
Spoon mixture onto skillet forming two pancakes.
Cook for a few minutes and then flip the pancakes to cook the other side.
Serve with a tbsp of reduced sugar ketchup or 2 tbsp sour cream!

Makes 1 Serving
Each serving provides
1 Fueling, 1/2 Condiment, and 1/4 Lean (if using cheese)

Additional Condiments:
1 tbsp Heinz Reduced Sugar Ketchup is 1 Condiment
1 tbsp sour cream ~ regular or light (1 Condiment)
2 tbsp sour cream is 1 Healthy Fat


Here is a delicious quiche recipe perfect to serve for Easter brunch! It is  packed with spinach and lots of lean protein to make this a delicious filling meal!


Spinach Cheddar Quiche

Ingredients:
6 eggs (2 Lean)
 10 ounces frozen chopped spinach, thawed and well drained or 1 1/2 cups cooked spinach (3 Greens)
 1 cup unsweetened almond or cashew milk (1 Condiment)
 1 cup 2% sharp cheddar shredded cheese (1 Lean)
 1/4 tsp salt (1 Condiment)
 1/4 tsp pepper (1/2 Condiment)
1/4 tsp garlic powder (1/2 Condiment)
1/4 tsp onion powder (1/2 Condiment)
 1/4 cup reduced fat feta cheese ** (2 Condiments)

Directions:
Preheat oven to 350 degrees. Spray a small skillet with non-stick cooking spray. Add spinach and cook for about 5 minutes or until excess moisture is removed. Remove from heat and let cool. In a bowl, whisk eggs, and unsweetened almond or cashew milk together. Stir in cheddar cheese and cooked spinach. Add salt, pepper, garlic powder, onion powder and feta cheese.

Grease a 9 inch pie dish. Add egg mixture. Bake for 45 minutes or until knife inserted in the center comes out clean. Remove and let cool in pie dish for 5 minutes before slicing and serving.

3 Servings (1/3 of quiche) with
1 Lean, 1 Green (still need 2 more per serving), and 2 Condiments per serving

** If you can't find reduced fat feta, use 1/4 cup regular feta as 4 Condiments. Or try 1/4 cup freshly grated parmesan cheese which is also 4 Condiments. This would give you 2.5 Condiments per serving instead of 2 Condiments per serving.


I love Korean Beef Bowls and they are so easy to make! They are perfect for a quick weeknight skillet meal and will quickly become a family favorite. They also freeze well so it is a perfect choice for those of us that meal prep!


Whisk the seasonings with the soy sauce until combined.


Brown ground meat and drain the meat. Then add the sauce and cook for a few more minutes.


While the meat is cooking, heat up your riced cauliflower in another skillet and cook for a few more minutes until heated thoroughly.


Serve the Korean Beef over cauliflower rice! Garnish with green onions and enjoy!


Korean Beef Bowls

Ingredients:
2 pounds 95 to 97% ground beef (4 Leans)
4 tsp sesame oil (4 Healthy Fats)
1 tsp ground ginger (2 Condiments)
1 tsp garlic powder (2 Condiments)
1 tsp onion powder (2 Condiments)
1/4 cup lite soy sauce (4 Condiments)
1 packet stevia or sweetener of choice (1 Condiment)
1/2 tsp crushed red pepper flakes (1 Condiment)
6 cups cooked grated cauliflower (12 Greens)

Directions:
Combine sesame oil, ground ginger, garlic powder, onion powder, soy sauce, stevia and crushed red pepper flakes in a small bowl. Use a whisk to mix thoroughly.

Brown ground beef over medium high heat. Drain meat and return to pan.
Add sauce mixture to cooked meat. Cook for a few more minutes stirring until the sauce is well blended with the meat.

Serve 6 ounces of cooked meat with 1 1/2 cups grated cauliflower per serving. 
I used Trader Joe's frozen cauliflower rice, but you can use fresh grated cauliflower if you desire. I add the frozen cauliflower to a medium skillet and cook for a few minutes until heated thoroughly.


4 Servings with 1 Leaner Lean (6 ounces cooked), 3 Greens, 3 Condiments, and 1 Healthy Fat per Serving


Who doesn't like BBQ? I love BBQ!

I must admit it can be difficult finding a great tasting BBQ sauce that is sugar free but I found two that are pretty tasty! They aren't entirely the same as the sugar laden BBQ sauce I absolutely love, but they are mighty tasty and allow me to stay on my weight loss plan.


The first one I will mention is Guy's BBQ Sauce. It comes in five flavors which are Original, Hot, Smokey Bacon, Smokey Garlic and Spicy. All of them are yummy, but Smokey Garlic has my heart! I really can not tell it is sugar free and it has the best texture and flavor compared to other sugar free BBQ sauces. I haven't found these in local stores yet so I order them online from Netrition. They charges a flat rate shipping fee so I try to stock up on everything I may want at once to save on shipping. 
The other BBQ sauce I like is G Hughes Sugar Free BBQ Sauce. I can only give props to the Hickory flavor. It is tasty, but I still like Guy's BBQ Sauce better. If I run out of Guy's, then I get this one because I can easily find it locally at Wal-mart. I tried the Maple Brown flavor and I had to throw out the bottle, but give it a try. You may like it, but it isn't a flavor I would get again. I haven't tried the Original or Honey so I can not vouch for them either. If you have tried them, let me know! You can also find them at Netrition too!  

Once you find your favorite BBQ sauce, you are ready to make this delicious recipe!

The meat is slow cooked in root beer which helps tenderize the meat and gives it a hint of sweetness. Then you drain the meat and shred it. Measure out 1.25 ounces of cooked meat and add 2 tbsp of BBQ sauce to it. Add the mixture to your cooked Lite Cali'flour Crust with some sharp cheddar cheese and put it back in the oven until the cheese has melted.

It really reminds me of a pulled BBQ beef sandwich because the crust will not get crispy. This is because of all the toppings! 

Cut the pizza in half and fold it over like a burrito. Serve it with 3/4 cup of cooked jicama fries or kale chips and you have an amazing meal!

Shredded BBQ Beef and Cheddar Pizza

Ingredients:
1.25 ounces cooked beef with 2 tbsp sugar free bbq sauce (1/4 Lean, 2 Condiments)
1/4 cup reduced fat sharp cheddar cheese (1/4 Lean)
Lite Cali'flour Foods crust * (1/2 Lean, 3 Greens)

To make Shredded Beef:
3 pound chuck roast
1 cup diet root beer
Sugar Free BBQ Sauce

Directions:
Season with spices of your choice, but subtract from your condiments. Place the roast in the slow cooker and add 1 cup diet root beer.  Cook on LOW for 8 hours.  Drain the beef and shred with a fork. Measure out 1.25 ounces of cooked beef and add 2 tbsp sugar free BBQ Sauce and set aside.

Bake crust for 10 minutes at 400 degrees. Let cool 10 min. Add shredded BBQ beef to the crust. Sprinkle 1/4 cup shredded sharp cheddar cheese on top. Bake for about 5 more minutes or until cheese has melted. Garnish with cilantro if desired.

1 Serving with

1 Lean, 3 Greens, and 2 Condiment per serving

* The recipe calculations are based on the Cali'Lite crusts and not the traditional cauliflower crusts.

Click Here to Print


Wondering what you should serve for a delicious Easter brunch? Here is a delicious quiche recipe that is perfect for Easter morning and it is a family favorite! 


I absolutely love the combination of savory Italian turkey sausage and sweet red bell peppers! I used a Sweet Red Pepper Cali'flour Foods crust for the bottom of my quiche. The cauliflower crust makes the quiche taste so much better! It adds texture that you might miss when doing a crustless quiche and the flavor is absolutely delicious! As you can see, these crusts aren't just for pizza... although they do make pretty amazing pizzas! I have found so many additional ways to use them. Try them as chips, as sandwiches, toast, burritos, enchiladas, quesadillas, or in lasagna! The possibilities are endless!

These pre-made cauliflower crusts count as 1/2 a Lean and 3 Greens for the entire crust on the Optavia or Medifast 5 and 1 plan! Only 180 Calories, 6 g of Carbs, 9 g of Fat, and 15 g of protein for the whole thing!Interested in purchasing the crust? Click HERE to order!


Italian Sausage Sweet Red Pepper Quiche

Ingredients:
6 ounces cooked Jennie-O Sweet Italian turkey sausage links (1 Lean)
4 eggs (1 1/2 Lean with 2 egg whites)
2 egg whites
1 1/2 cups sweet red bell pepper, chopped (3 Greens)
1 cup unsweetened almond milk (1 Condiment)
1 cup shredded 2% sharp cheddar cheese (1 Lean)
1/4 tsp salt (1 Condiment)
1/4 tsp pepper (1/2 Condiment)
2 tbsp reduced fat grated parmesan cheese (1 Condiment)
1 Lite Cali-flour Foods cauliflower crust * (1/2 Lean, 3 Greens)

Directions:
Preheat oven to 350. 
Remove pizza crust from freezer to thaw.
Remove sausage from casings. In a medium sized skillet, brown sausage over medium high heat until cooked. Drain and set aside. 

Grease a 9 inch pie dish. When crust is thawed, place in pie dish. The crust fit perfectly on the bottom of my pie dish! Bake in oven for 5 minutes. For extra crisp on the crust, broil on high for 2 more minutes or until golden brown. Remove from oven and set aside.

In a bowl, whisk the eggs, egg whites and unsweetened almond milk together. Stir in cheddar cheese, cooked sausage, and chopped red pepper. Add salt, pepper and grated parmesan cheese stirring until combined. Add egg mixture to pie dish.

Bake for 45 to 50 minutes or until knife inserted in the center comes out clean. Remove and let cool in pie dish for 5 minutes before slicing and serving.

4 Servings (1/4 of quiche) with
1 Lean, 1 1/2 Greens (need 1 1/2 more per serving), and 1 Condiment per serving

The recipe calculations are based on the Cali'Lite crusts and not the traditional cauliflower crusts.

***************************************************************

Other sausage substitutions that are plan approved:

5 ounces Jennie-O all natural bulk sausage; the Hot bulk sausage is higher in sodium.
6 ounces Jennie-O Sweet Italian turkey sausage
5 ounces Jennie-O Turkey Breakfast Patties
5 ounces Jennie-O Turkey Breakfast sausage Links
Johnsonville Fully Cooked Breakfast Sausage: 6 links = 1 lean
Gilbert Chicken Sausage: 2 links = 1 lean
Al Fresco Sweet Italian: 2 links = 1 lean
Al Fresco Smoked Andouille: 2 links = 1 lean


Don't have the crust? Here is a crustless recipe!

Click Here to Print

Craving a Big Mac? Or pizza? Why not both?

Can you imagine how many calories and carbs you would be eating if you had a McDonald's Big Mac and say... a pizza from Papa John's? A HUGE amount!

In the past... that was actually pretty common for me to have in any given day. Today it is all about making healthier choices so that I can live a healthier life, but that doesn't mean we have to eat boring foods! My mom used to say don't play with your food when I was little... well I am so glad I didn't listen! Otherwise, I wouldn't have been eating this Big Mac Pizza!


Using a pre-made cauliflower crust from Cali'flour Foods is what allows this pizza to be healthier than using a traditional pizza crust. These cauliflower crusts are made with only a few clean ingredients which include cauliflower, mozzarella cheese, egg and spices. No fillers like some of the cauliflower pizzas on the market! Not to mention they are an approved option on the 5 and 1 plan!

Check out the sales they are currently running and order your crusts HERE! Make sure you choose the Lite crusts since they count as 1/2 a Lean and 3 Greens for the entire crust!


These crusts can be stored in the freezer up until 9 months and they cook up nicely from frozen. No need to thaw.

For this recipe, I pre-baked the crust for about 9 minutes. Then I let it cool completely. Don't skip this step because cooling the crust helps the crust to firm up. It also helps to use a vented pan like the one I have above or a pan with holes in it (perforated pan). A vented pan allows the heat to reach the entire crust as it bakes which results in a crispier crust.


Add cooked ground turkey or beef and shredded cheddar cheese on top of the crust.


Bake for about 5 minutes until the cheese is melted.


Top the pizza with lettuce and tomatoes. Then drizzle the dressing over the top.


Lastly, add the chopped dill pickles! The pickles totally completes this pizza so don't leave them out!


Slice and serve! Share this yummy pizza with someone who is a fan of Big Macs and pizza! Enjoy!


Big Mac Pizza

Ingredients:
Lite Cali'flour Foods pizza crust *  (1/2 Lean, 3 Greens)
1.75 oz 99% ground turkey, seasoned and cooked (1/4 Leanest Lean)
1/4 cup reduced fat sharp cheddar cheese, shredded (1/4 Lean)
1/2 cup lettuce, chopped (1/2 Green)
1/4 cup tomatoes, chopped (1/2 Green)
2 dill pickles, chopped (1 Optional Snack)

For Dressing:
2 tbsp Lite Wishbone Thousand Island Dressing (1 Healthy Fat)
1/8 tsp white wine vinegar
Light sprinkle of stevia, optional

Directions:
Preheat oven to 400 degrees.
Bake for 10 minutes. Let cool completely at least 10 minutes.

Combine the ingredients of the dressing in a small bowl and stir until combined. Set aside.

Sprinkle ground turkey and cheese on top of crust.
Bake an additional 5 minutes or until cheese has melted.
Add lettuce, tomatoes, and pickles.
Drizzle dressing mixture on top of pizza.

2 Servings with
1/2 Lean (still need 1/2 Lean more per serving), 2 Greens (still need 1 Green more per serving), 1/2 Healthy Fat, and 1/2 Optional Snack per serving
(Half the pizza)

* The recipe calculations are based on the Cali'Lite crusts and not the traditional cauliflower crusts.


I have been so in love with these sausage "biscuits"! Well, they aren't really biscuits but man oh man... I promise you... you will not miss the biscuits! These egg whites hold the sausage patties together like a sandwich and the flavor is all there minus the extra carbs and calories!


I topped this sausage biscuit with a tablespoon of guacamole (1/2 Healthy Fat) because guacamole tastes wonderful with egg whites! Another idea? Skip the guacamole and add a tablespoon of salsa (1 Condiment)! Spice up your life with salsa or cool it down with guacamole!


These egg white biscuits are so easy to make! Start off by placing two regular mouth mason jar lids with the center part removed in a medium non-stick skillet. Spray the pan and mason jar lids with cooking spray.


Place one egg white in each lid. Then pour a little less than 1/2 a cup of water or enough water to cover the bottom of a skillet.


Cover the skillet with a lid and cook for about 3 minutes or until cooked thoroughly.


Carefully remove egg whites from the lids. You may need to use a knife to loosen the edges if the egg whites stick to the lid, but I didn't find it necessary. Top with your favorite toppings or enjoy plain!


Egg White Sausage Biscuits

Ingredients:
2 regular mouth mason jar lids
2 large egg whites, separated or 1/4 cup egg whites from the carton
1 Jimmy Dean turkey sausage patty

Directions:
Place 2 regular mouth mason jar lids in a medium sized skillet over medium high heat.
Lightly spray the skillet and the lids with cooking spray. 
Place 1 egg white or 2 tbsp egg whites from the carton in each mason jar lid.
Pour a little less than 1/2 cup of water or enough water 
to cover the bottom of the skillet.
Cover the skillet with a lid and cook for 3 minutes or until egg whites 
are cooked thoroughly.
Remove the lids with egg whites from the skillet.
Carefully remove the egg whites from the lids using a knife to loosen the edges of the egg whites from the lid if necessary.
Place heated sausage between the egg whites. Enjoy!

Makes 1 Serving with 1/3 Lean
(You will still need to add 2/3 Lean such as 3.3 oz lean beef or 4 oz of chicken breast or 4.6 oz shrimp plus any required healthy fats and all your Greens for the day!)


Let's Taco about this delicious meal! It is perfect for Taco Tuesday and super duper easy to make! Throw everything in the crock pot and let the crock pot do the cooking for you! Win win chicken din!


Crock Pot Ranch Chicken Tacos

Ingredients:
2 lbs boneless skinless chicken, raw and trimmed (4 Leaner)
1 tbsp low sodium taco seasoning (6 Condiments)
1 tbsp ranch seasoning mix (6 Condiments)
1/2 cup water

Directions:
Mix water, taco seasoning, and ranch seasoning mix together in a small bowl. Add chicken to crock pot. Pour seasoning mixture on top of chicken. Cook on low for 6-8 hrs or high for 3-4 hrs. Shred chicken before serving. Divide chicken into 4 equal portions.

Makes 4 servings
Per Serving: 1 Leaner protein and 3 Condiments

Don't forget to add your 3 Greens and 1 Healthy Fat such as 2 tbsp sour cream, 2 tbsp Guacamole, or 1.5 oz avocado per serving.

Click Here to Print


I am a veggie lover and the veggie I am most in love with right now are sweet bell peppers! Could it be because they have the word sweet in their name? I do naturally tend to gravitate towards all things sweet! Possibly not, but they are really delicious!

I love to eat them raw, roasted, or in my newest kitchen appliance... the air fryer! These days it seems I have been using my air fryer more than my oven. I love it that much! Today, I stayed old school and used the oven and made these yummy stuffed peppers! That is another great thing about peppers! Stuff it with your favorite meats and you have a wonderful meal that includes both your Lean and Greens!


You can use any color pepper of your choice, but I love the red, orange, and yellow ones the most! All peppers start off being green and then they change color as they ripen. They turn yellow, then orange and then red as they ripen. Because the green ones are picked before they are ripe, they lack lots of nutrients and are not as sweet. I still love you green pepper!

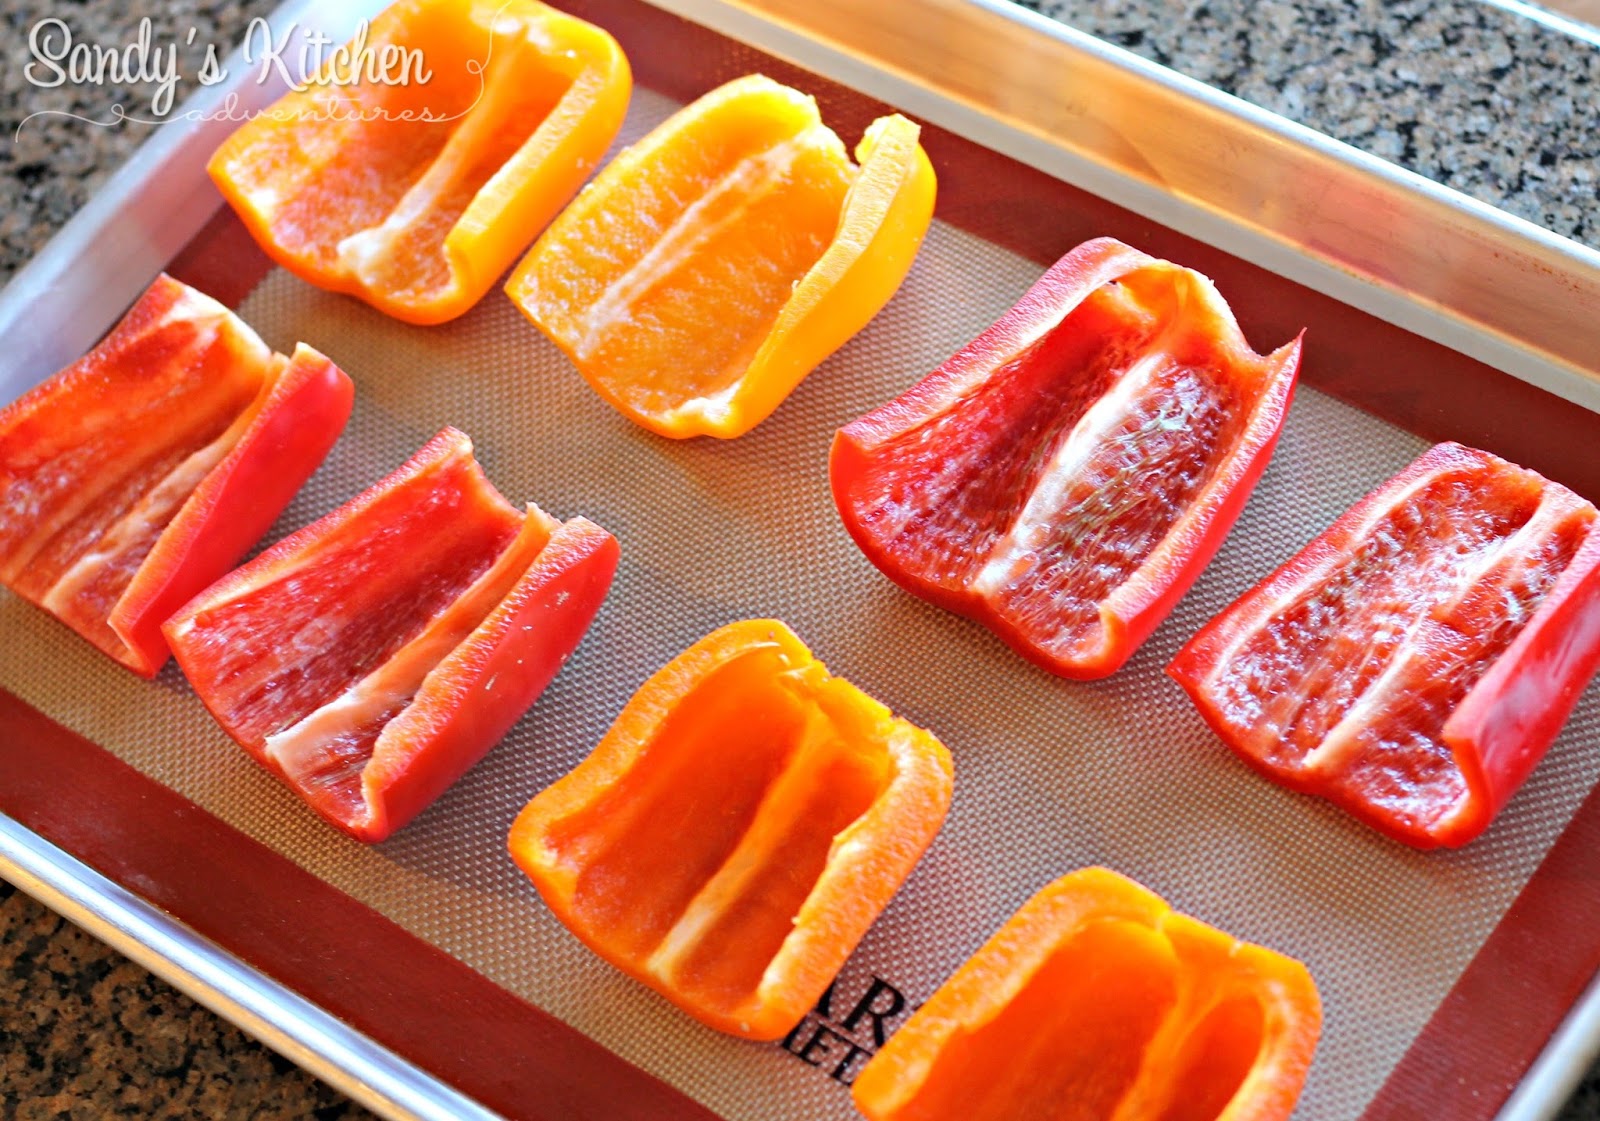
Prepare your peppers by slicing the tops off horizontally. Then split the peppers in half lengthwise. Take out the seeds and membranes and lay them on a baking sheet.

Bake for 8 to 10 minutes if you like slightly crunchy peppers or 10 to 15 minutes if you like soft peppers. I baked mine for a full 15 minutes and it came out perfect! I prefer a softer pepper.


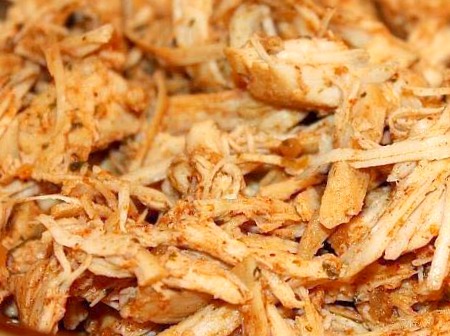
Combine your cooked chicken, celery, half the cheese, cream cheese, and ranch dressing.


As well as this amazing sauce right here! This stuff is life!

Mix all the ingredients together until everything is evenly coated.


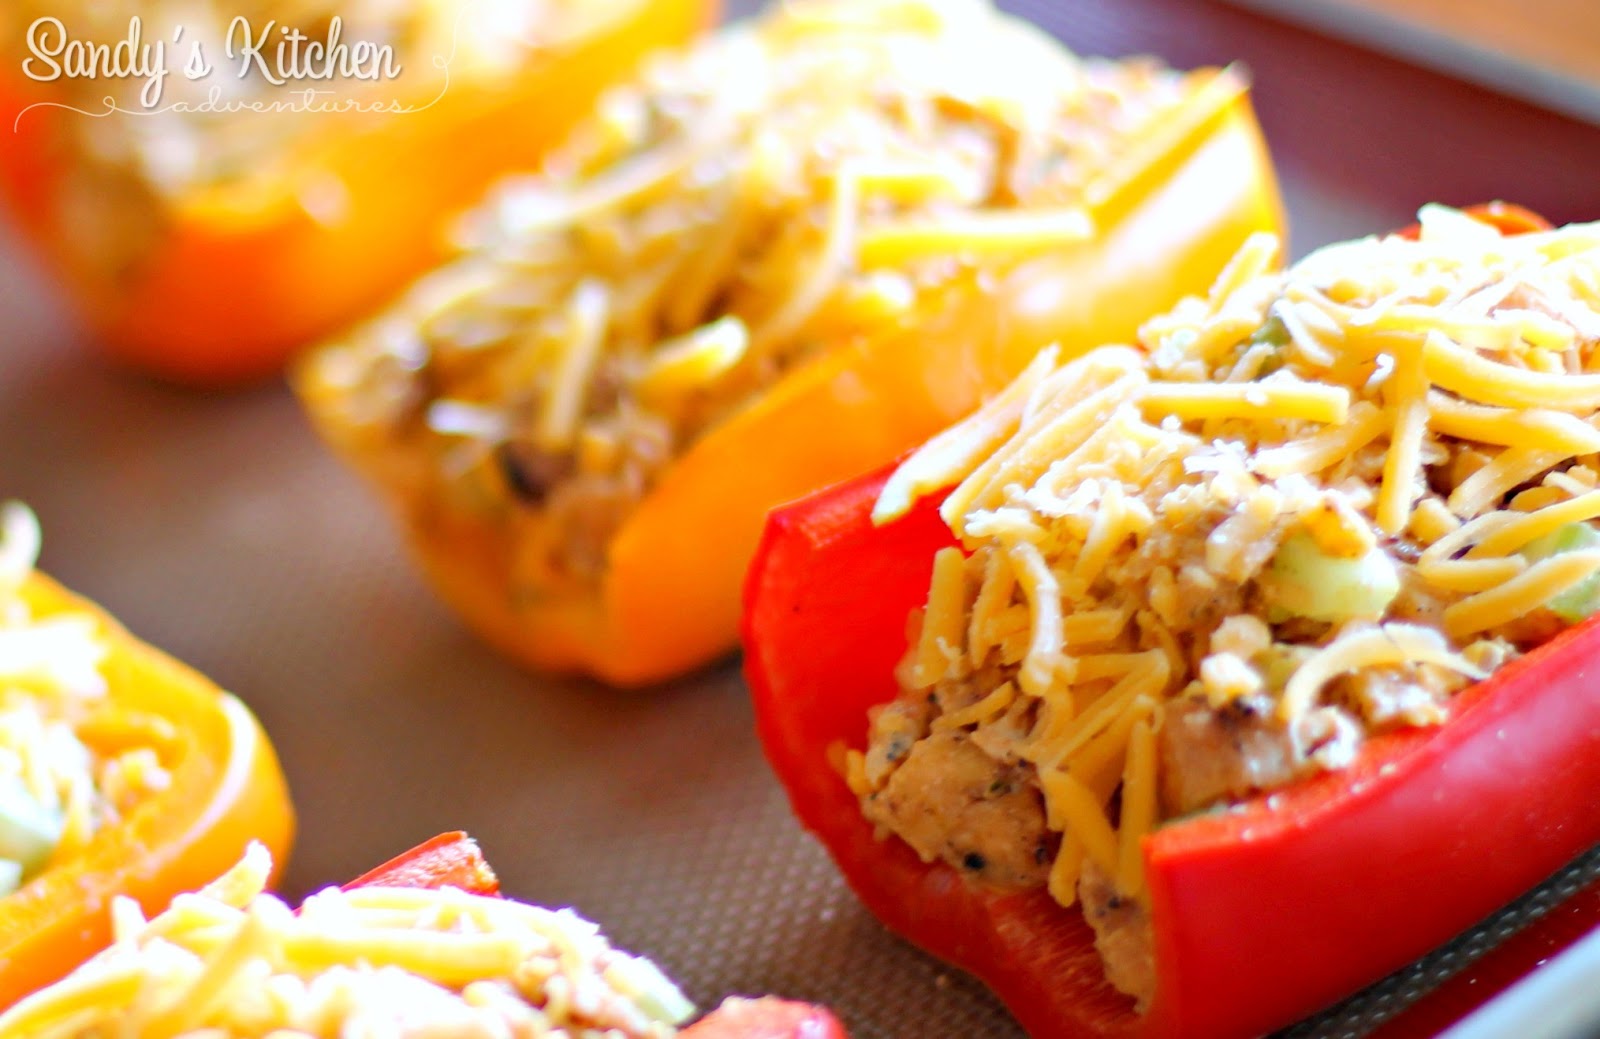
Stuff your peppers with the delicious creamy mixture.


Then top each pepper with remaining 1/2 cup of cheese.


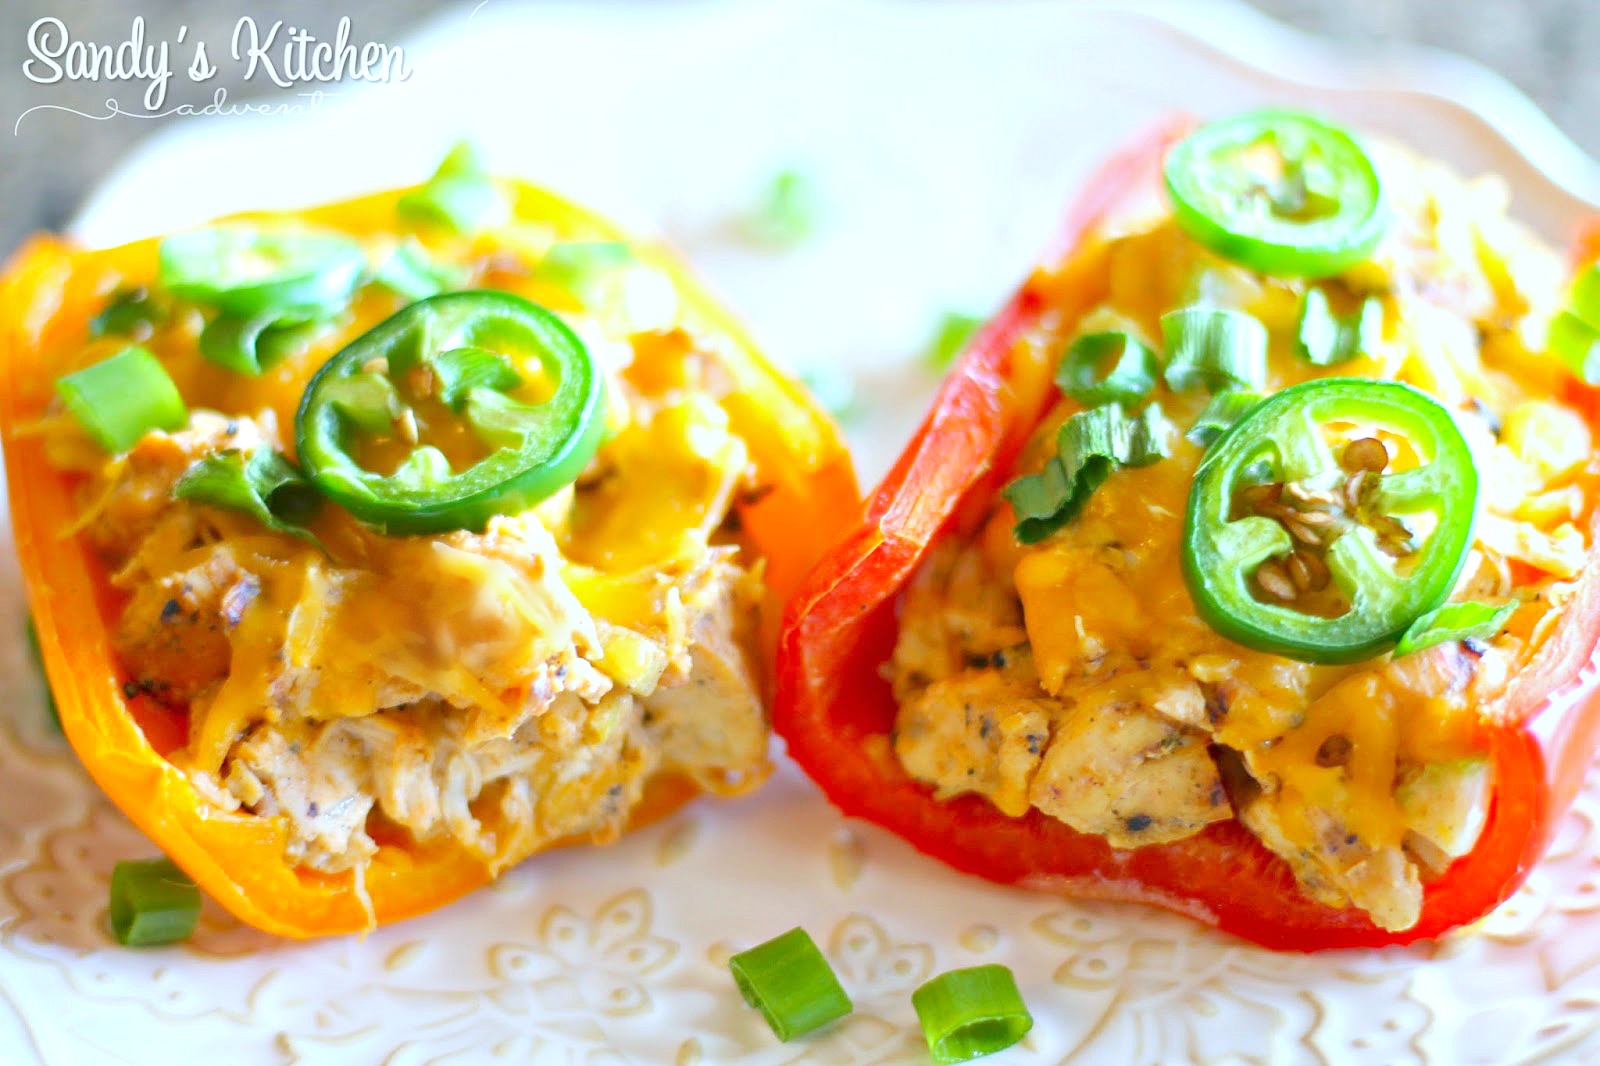
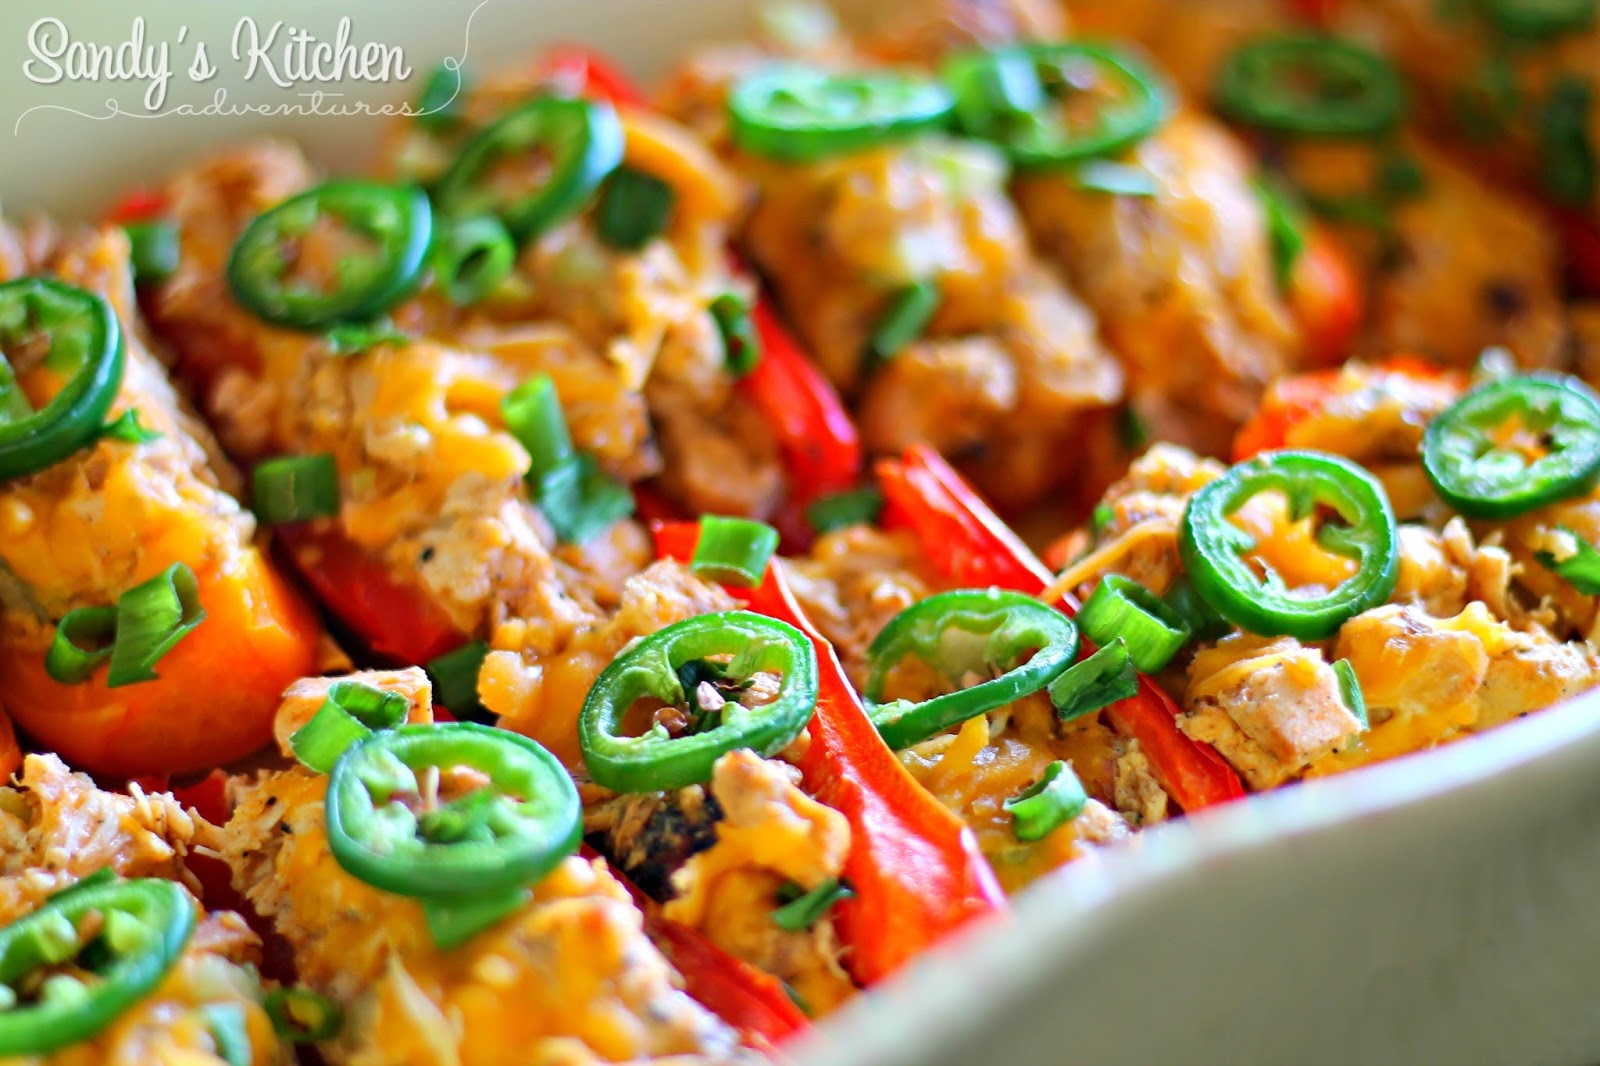
I added sliced green onions and a few fresh jalapenos as a garnish. 


As if it needed these stuffed peppers to be more spicy! They really weren't too spicy. The cool ranch dressing cuts some of the spiciness of the hot sauce. A marriage made in heaven!


Bake for an additional 10 minutes to get that cheese nice and melted! Enjoy because you will have leftovers... unless of course you have someone to share with!

You could also split each half pepper in half or in thirds and serve them at your next get together! Cutting them into thirds, gives you 24 pieces. You can have 8 of those peppers as a Full Lean and Green! Almost too pretty to eat! Almost!


Buffalo Chicken Stuffed Peppers

Ingredients:
12 ounces cooked chicken breasts, chopped or shredded (2 Leaner Leans)
1/2 cup celery, chopped (1 Green)
1 cup reduced fat sharp cheddar cheese, divided (1 Lean)
3 tbsp reduced fat cream cheese (3 Condiments)
1/4 cup Frank's hot sauce (2 Condiments)
1/4 cup light ranch dressing (2 Healthy Fats)
4 bell peppers any color, each cut in half from stem to base, 
tops and seeds removed (8 Greens)

Directions:
Preheat oven to 400 degrees.
Slice the tops of the peppers, horizontally like a lid.
Cut the peppers in half from top to bottom. Remove the seeds and membranes.
Lay pepper halves on baking sheet and cook 8 to 10 minutes if you prefer al dente peppers, 
or 10 to 15 minutes if you prefer soft peppers.

Combine, chicken, celery, 1/2 cup cheese, cream cheese, Frank's hot sauce,  
and ranch dressing in a large bowl. Stir until combined.
Stuff your peppers with the chicken mixture.  Then top with 1 tbsp of cheese per pepper half.
Return the peppers to the oven and bake for an additional 10 minutes
or until cheese is melted.

Makes 3 Servings
Each serving provides
1 Lean, 3 Greens, and 2 Condiments

There will be a total of 8 pepper halves. Divide 2 of the pepper halves into thirds. You can have two pepper halves plus two of the 1/3 sections as 1 serving! That's a whole lotta food!


Powered by Blogger.