Cheater, cheater pumpkin eater... okay maybe not with pumpkin... but I did make some delicious Mexican cauliflower rice using only a few ingredients so it felt like I was cheating! What I mean by cheating is making the recipe quicker and easier to make than the traditional method. I know it isn't your traditional Mexican rice, but it sure is yummy and that is what matters! Right?!


This recipe makes 6 (3/4 cup) servings so you will still need another Green and a half for the day. I had grilled Southwestern shrimp leftover so I decided to use this rice to make a delicious salad! No boring salad for me! I used 7 ounces of grilled shrimp (1 Leanest), 1 1/2 cups lettuce (1 1/2 Greens), 3/4 cup Mexican cauliflower rice (1 1/2 Greens), and 2 tablespoon of light ranch dressing (1 Healthy Fat) to make my salad.


To season the shrimp, I used 1/2 tsp Stacey Hawkins Southwestern seasoning and 1 tsp Stacey Hawkins Roasted Garlic Oil. Then I skewered the shrimp and threw it on the grill. I love Stacey Hawkins seasonings because it takes the guess work out of determining how much of THIS spice and THAT spice I need to create a certain seasoning blend. Not to mention, they taste great! You can purchase her seasonings HERE!


Quick and easy Mexican style shrimp salad with a drizzle of light ranch dressing!


I also enjoyed broiled tilapia seasoned with Stacey Hawkins Citrus Dill Seasoning, Garlic Gusto Seasoning, and a tsp of her Roasted Garlic oil which gives it more garlic flavor! I added 3/4 cup of roasted broccoli and 3/4 cup Mexican cauliflower rice to complete my Lean and Green for the day! Delicious, quick and easy meals! Trust me... you don't have to eat the same thing over and over again!


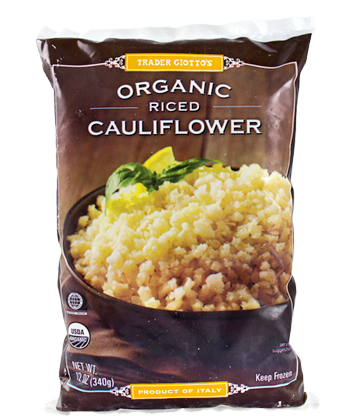
To make the Mexican cauliflower rice, use already grated or riced cauliflower. It will make your life easier! I used this one from Trader Joes and love it! They actually have fresh or frozen grated cauliflower. This particular one was in the frozen section.


Add a tablespoon of oil to a large skillet and heat over medium heat. Add the partially frozen cauliflower to the skillet and cook for about 10 minutes or until the cauliflower is tender.


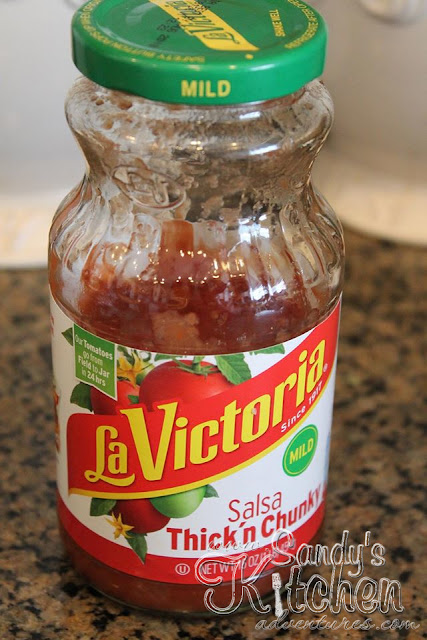
Salsa is your main ingredient! Well... besides grated cauliflower of course! This is why I call this cheater Mexican cauliflower rice! The salsa has all the ingredients (tomato, onion, green chilies, jalapenos, and spices) you need to make this cauliflower rice have Mexican flavors. Add your salsa and additional cumin and stir until combined. That's it! Ready in less than 15 minutes! Enjoy!


Cheater Mexican Cauliflower Rice

Ingredients:
4 1/2 cups cauliflower rice (9 Greens) ~ I used partially defrosted Trader Joes riced cauliflower
3/4 cup salsa (12 Condiments)
1/2 tsp taco seasoning (1 Condiment)
1 tbsp Stacey Hawkins Roasted Garlic Oil or olive oil (3 Healthy Fats)

Directions:
Heat oil in a large non-stick skillet over medium heat.
Add cauliflower and cook for about 10 minutes or until cauliflower is tender.
Season with salt and pepper if desired, but subtract from your condiments.
Add salsa and taco seasoning stirring until combined.
Divide into 6 equal portions.
Enjoy!

Makes 6 Servings (3/4 cup)
Each serving provides
1 1/2 Greens, 2 Condiments, and 1/2 Healthy Fat per serving
(Still need 1 1/2 Greens more such as 3/4 cup broccoli)


I love having pizza almost every week, usually a Friday night when everyone is home and excited that the weekend is finally here! There is just something about that yummy, cheesy dish that makes me sooo VERY happy and I love that my entire family enjoys it!

Because I have been eating healthier and focusing on my health these days, I don't eat the unhealthy, carby delivery pizza anymore. Instead, I have been getting cauliflower crusts online at Cali'flour Foods. I can not say enough great things about Cali'flour Foods! I love their crusts because they taste great and they are so convenient to have in the freezer! They last up to 9 months in the freezer and up to 7 days in the fridge so they last a long time! Sure, I can make my own crusts, but it is so much easier to have it already made for you! Check them out and give them a try!

One of my favorite pizzas to make is a fresh basil, mozzarella and roasted grape tomato pizza. Simple fresh ingredients that adds lots of flavor!


I have a perforated pizza pan which is a pan with holes on the bottom. These holes allow the heat to heat the pizza crust directly while baking, resulting in a crispier crust. Plus it speeds up baking time! 

I lightly sprayed the crust with olive oil cooking spray and then added fresh minced garlic. Then I baked the crust for about 8 to 10 minutes at 400 degrees. Let it cool at least 10 minutes to get a firmer crust.


Next, I roasted grape tomatoes on a non-stick foil lined baking sheet. I sprayed them lightly with olive oil cooking spray and roasted them for about 15 to 20 minutes at 400 degrees. Roasted tomatoes make sweet and tangy bursts of flavor in your mouth so don't skip this step! The recipe would not be the same without them!


Add mozzarella, chopped basil and the roasted tomatoes to the pizza crust. Bake for an additional 5 minutes at 400 degrees or until cheese has melted.


Look at that delicious pizza! Now what is it missing?


A delcious sweet and tangy balsamic vinegar reduction! I love Stacey Hawkins Balsamico Mosto Cotto! Balsamic reduction is slightly thicker and more syrupy than regular acidic balsamic vinegar. If you don't have this, you can always drizzle a little balsamic vinegar on top, but know that it isn't quite the same as a balsamic reduction. 


This one is 3 grams of carbs and only 10 calories for 1 tablespoon! 
Click Here to check out her other products and sign up for her newsletter for recipes, tips and specials!


Fresh Basil, Mozzarella and Roasted Tomato "Pizza"

Ingredients:
Lite Cauliflour Foods Cauliflower Crust *  (1/2 Lean, 3 Greens)
1 tsp fresh minced garlic (1 Condiment)
1/2 cup 2% reduced fat mozzarella cheese (1/2 Lean)
1/2 cup grape tomatoes (1 Green)
1/4 cup fresh basil, chopped (1/2 Condiment)
1 tbsp Stacey Hawkins Balsamic Mosto Cotto or Balsamic Vinegar (3 Condiments)
Olive oil cooking spray

Directions:
Preheat oven to 400 degrees. Line a baking sheet with non-stick foil. Spread grape tomatoes on pan. Spray tomatoes lightly with olive oil cooking spray. Bake for about 15 to 20 minutes. Set aside.
Preheat oven to 400 degrees. Place pizza crust on pan with parchment paper, pizza stone or pizza pan with holes. Spray the crust lightly with olive oil cooking spray. Spread minced garlic on top of crust and bake for about 10  minutes. Let cool for 10 minutes so crust can firm up. 
Add mozzarella cheese, fresh basil, and roasted grape tomatoes on top of the pizza crust. Bake 5 more minutes or until cheese has melted. Drizzle with Balsamic Mosto Cotto or balsamic vinegar.

2 Servings with
1/2 Lean, 2 Greens, and 2.25 Condiments per serving (Half the pizza)
Still need 1/2 Lean and 1 Green more per serving

* The recipe calculations are based on the Cali'Lite crusts and not the traditional cauliflower crusts.


Being from the South, one of my favorite meals is BBQ pulled pork!
I especially love BBQ pulled pork on a nice hot sesame bun and a slather of cole slaw. Oh yum!
I wanted to re-create this dish using some healthier alternatives.


I definitely had to ditch the bun. No bun hun!


I decided to use the already prepared cauliflower pizza crust from Cal'flour Foods. Why do I love them so much?

I love not having to spend an entire afternoon making my own crusts. They comes shipped to my door in a matter of days by priority mail! Talk about convenience!

I also love the taste of these crusts and that they come in two yummy flavors which are Italian and Plain!

No soggy veggie crusts and they bake up nicely!

You can purchase them HERE!


The next thing I did was choose leaner chicken breasts over pork. This allowed me to use up a healthy fat, which is the mayo, to make the cole slaw that tops the pizza. 

To make the pulled BBQ chicken, I decided to use my new Instant Pot! I am still fairly new to the whole pressure cooker scene, but so far I am loving it! If you don't have an Instant Pot, don't worry! Use your trusty old slow cooker! I still love my slow cooker!

The Instant Pot does cook up faster than a slow cooker, but don't think the 25 minute cooking time is all there is to it. It takes about 10 minutes for the Instant Pot to come to pressure. Then 25 minutes to cook and then tack on the 10 to 15 minutes (maybe more) to do a natural pressure release. You still get to have delicious BBQ pulled chicken in a little over an hour, instead of the usual 6 to 8 hours! Sounds pretty good to me!

I added just the chicken breasts and root beer to the instant pot and the chicken turned out extremely moist and sooo yummy! You can also add any extra seasonings if you like, but I didn't add anything else. The root beer helps tenderize the meat as well as give it a slightly sweetened flavor. If you don't have root beer, coca cola works too!

This is the shredded chicken before adding the BBQ sauce.


After your chicken is cooked, drain the meat. Add the chicken to a bowl so you can add your BBQ sauce. I get asked often about which BBQ sauce I like to use. There are mainly two brands that I enjoy.


The one above, G Hughes Smokehouse Sugar Free Hickory BBQ sauce, is the one I used for this recipe. It is easy to find at your local grocery stores so you don't have to order it online. I found this one at Wally World by all the other BBQ sauces. I can't say that I like all their flavors though. I couldn't stand the Maple Brown flavor so I had to toss it, but Hickory is quite good.


The other sugar free BBQ sauce I like is Guy's Award Winning BBQ Sauce. I have only found this sauce online which comes in 5 flavors: Hot, Original, Smokey Bacon, Smokey Garlic and Spicy. My favorite? Smokey Garlic! I have tried all of them and they were all yummy! You can find them HERE.


Once you have your BBQ pulled chicken set aside, make the cole slaw using already packaged cole slaw mix or shredded cabbage. I left the carrots in the mix because the slaw is only 5 grams of carbs for the entire 1 1/2 cups. A Green on the Medifast plan must be below 5 grams of carbs per 1/2 cup. Besides... the little orange pieces add color!


I added 2 tbsp of reduced fat mayo, 1/2 tsp apple cider vinegar, and about 1/2 a packet of Stevia to the cole slaw mix. I like to use Splenda Naturals Stevia packets or Nu Naturals Stevia packets. Both sweeteners work well for cooking. Set aside the cole slaw until the pizza is hot out of the oven!


Place your cauliflower pizza crust on parchment paper (not waxed) and bake for about 5 minutes in a pre-heated oven. Doesn't that crust look delicious?


Add 6 ounces of pulled BBQ chicken on top of the crust.


Drizzle more BBQ sauce on top if desired! I desire!


Sprinkle shredded sharp cheddar cheese over the chicken and bake for about 10 to 12 minutes or until cheese is melted.


Once the pizza is out of the oven, then add the prepared cole slaw.


Cut into 4 slices...


... but you can have two of those yummy slices! Crunchy creamy cole slaw over sweet BBQ chicken! Yes please! Enjoy this yummy recipe!


Pulled BBQ Chicken Pizza

Ingredients:

6 ounces Prepared Pulled BBQ Chicken ~ Recipe Below (1 Lean, 3 Condiments)
1/2 cup 2% Sharp Cheddar Cheese, Shredded (1/2 Lean)

For the Slaw:

1 1/2 cup Shredded Cole Slaw Mix or Shredded Cabbage (3 Greens)
2 tbsp Reduced Fat Mayo (2 Healthy Fats)
1/2 tsp Apple Cider Vinegar
1/2 Packet Stevia, or to taste (1/2 Condiment)

For the Instant Pot or Slow Cooker Pulled BBQ Chicken:

36 ounces Chicken Breasts (4 Leans)
12 ounces Diet Root Beer
3/4 cup G Hughes Smokehouse Sugar Free Hickory BBQ Sauce (12 Condiments)

Directions:

Place chicken and root beer in the Instant Pot.
If you would like to add any other seasonings such as salt, pepper, garlic powder, etc, 
please do so at this time. I added the root beer only.
Put the lid on the Instant Pot and turn the float valve to sealing.
Press the poultry setting button and adjust the cooking time to 25 minutes.
When done cooking, do a 10 to 15 minute natural pressure release.
After 10 to 15 minutes, there may still be some pressure left in the pot.
That is okay. Just turn the float valve to venting to release the rest of the pressure.
Wear an oven mitt and be careful of the steam! 
This ensures moist chicken.
Drain the chicken and shred with a fork.
Add BBQ sauce and set aside.

If using a slow cooker, cook the chicken and root beer on 
Low for 6 to 8 hours or High for 3 to 4 hours. 
Drain the chicken and shred with a fork. 
Add BBQ sauce and set aside.

Reserve 6 ounces of pulled BBQ chicken for the recipe and store the rest as left overs.

~~~~~~~~~~~~~~~~~~~~~~~~~~~~~

Make the slaw.
Place cole slaw mix or shredded cabbage in a small bowl.
Add mayo, apple cider vinegar, and stevia to taste.
Set aside.

~~~~~~~~~~~~~~~~~~~~~~~~~~~~~

Preheat oven to 375 degrees.
Add parchment paper on top of a pizza pan.
Place cauliflower pizza crust on parchment paper.
Bake for 5 minutes.

Top pizza crust with 6 ounces of pulled BBQ chicken.
Drizzle any extra BBQ sauce on top if desired.
Sprinkle shredded cheddar cheese on top.
Bake for 10 to 12 minutes or until cheese is melted.

Top with cole slaw.

Makes 2 Servings

Each Serving (half of the pizza) provides:
1 Lean, 3 Greens, 1.75 Condiments, and 1 Healthy Fat


Sometimes I just want a delicious grilled cheese sandwich, but I don't want all the carbs that come with eating traditional white or wheat bread! I also don't want to sabotage all the hard work I put in to staying on plan! So what is a girl to do?

Come up with another alternative!

These "bread" slices made from grated cauliflower are actually pretty tasty! No, they don't really taste like bread, but it sure does help hold all that yummy cheese and sliced turkey breast together! I find that cauliflower can mimic a lot of  different foods such as pizza crusts, breads, pasta, etc so it just so happens to be one of my favorite veggies right about now!

I do find these "bread" slices to be a little bit more time consuming than using regular bread and you do have to be extra careful with flipping them over on the skillet. But that's okay! My health will thank me later!


I used my large electric griddle to cook these babies up. It allowed me to cook all four slices at once so it took less time to make them. Just remember to be very patient and careful when flipping the slices. You don't want the slices to fall apart! Get them nice and golden before you flip them. Once you have your slices done, top with cheese and turkey slices and cook until the cheese has melted. Delish!

The recipe below makes two yummy servings so make sure you have someone to share it with or you could always save the other one for tomorrow! Stick it in the fridge and then heat it up in the skillet again the following day! Serve with 1 Green of your choice to complete your Lean and Green meal!


Grilled Turkey and Cheddar "Sandwich"

Ingredients:
2 cups grated cauliflower (4 Greens)
1 egg (1/3 Lean)
1/4 cup freshly grated reduced fat Parmesan cheese * (2 Condiments)
1/4 tsp dried Italian seasoning (1/2 Condiment)
2/3 cup shredded 2% sharp cheddar cheese (2/3 Lean)
7 ounces thinly deli sliced turkey breast (1 Leanest)

Directions:
In a medium bowl, combine grated cauliflower, egg, Parmesan cheese, 
and Italian seasonings. Mix until evenly combined. Set aside.

Heat a large non-stick skillet or griddle over medium heat.
Spray with cooking spray. Scoop the cauliflower mixture into a small patty and place on the skillet or griddle. Repeat to form a second, third and fourth patty. These are your "bread" slices.

Press down on the pieces with a spatula and cook until golden underneath,
about 5 minutes. Flip carefully and cook until the other sides are golden, about 3 minutes more.

Top a cauliflower slice with 1/3 cup cheese and 3.5 ounces of turkey. Place a cauliflower slice on top. Repeat with the other two slices. You will have two sandwiches. Cook until cheese is melted, about 2 minutes more per side.

Makes 2 Servings
Each serving provides
1/2 Lean, 1/2 Leanest, 2 Greens, and 1.25 Condiments per Sandwich

(You still need 1 more Green and 1 Healthy Fat for the day.)

* If you can't find freshly grated reduced fat Parmesan cheese, use regular Parmesan cheese. It would then be 2.25 Condiments per serving.


This was delicious! The important part is to make sure your shredded chicken is already seasoned. Nothing is worse than plain old chicken without any seasonings. I used rotisserie chickens form the grocery store to save time. Then I removed the skin, the bones, and shredded the chicken breasts only. The meat is already seasoned and made for you so it makes this meal quick and easy! You all know how I love those kind quick and easy meals!


Put the shredded chicken at the bottom of a 2 quart casserole dish that has been sprayed lightly with cooking spray.


Sprinkle dried basil and dried oregano over the chicken. Then combine the light laughing cow cheese with plain Greek yogurt in a small bowl. You may need to heat up the laughing cow cheese for about 10 to 15 seconds in the microwave so that it blends well with the yogurt. You could also use 6 tbsp of light cream cheese in place of the light laughing cow cheese, but I prefer the laughing cow cheese because of the variety of flavors they come in. Spread it over the chicken.


Spread blended Italian diced tomatoes that is less than 5 grams of carbs per 1/2 cup. Great Value from Walmart is a great choice!


Sprinkle grated parmesan cheese and shredded mozzarella cheese on top.


Bake for about 30 minutes or until cheese has melted. A yummy quick meal that pairs nicely with zucchini noodles or spaghetti squash. You would need 1 cup of zucchini noodles or spaghetti squash per serving of Italian Chicken Bake to complete your Lean and Green meal! Enjoy!


Italian Chicken Bake

Ingredients:
12 ounces shredded chicken breasts, cooked (2 Leaner Leans)
1 tsp dried basil (1/2 Condiment)
1/2 tsp dried oregano (1/2 Condiment)
1 1/2 cups Great Value Italian diced tomatoes, blended (3 Greens)
6 wedges of light laughing cow cheese - any flavor will do (3 Healthy Fats)
1/2 cup low fat plain Greek yogurt (1/3 Leaner Lean)
2/3 cup shredded part-skim mozzarella cheese (2/3 Lean)
1/4 cup grated reduced fat parmesan cheese (2 Condiments)

Directions:
Preheat oven to 350 degrees.  Lightly spray a 2 quart casserole dish with cooking spray. Place shredded chicken at the bottom of prepared dish.  Sprinkle basil and oregano over shredded chicken breasts. Use any additional garlic powder, salt, or pepper to season your chicken if it isn't seasoned already. I used store bought rotisserie chicken so it was already seasoned.

Combine light laughing cow cheese and yogurt in a small bowl. 
You may need to microwave the laughing cow cheese for about 10 to 15 seconds to soften it up a bit so that it blends easier with the yogurt. Spread yogurt mixture over chicken. Then spread tomato sauce over yogurt mixture. Top with parmesan cheese and mozzarella cheese. Bake for about 25 to 30 minutes or until the casserole begins to bubble and cheese is melted.
Divide into three equal portions.

3 Servings with 
1 Lean, 1 Green, 1 Condiment, and 1 Healthy Fat per Serving


I love crock pot recipes and for good reason! Being a busy mom of two little ones always feels like there is never enough time in the day, especially for cooking! But of course.... we got to eat! I don't want to resort to unhealthy choices for my family and I because of lack of time or planning. All you have to do is throw these recipes together and just forget about it.

This recipe has  lot of flavor so you aren't eating plain old shredded chicken from the crock pot! Also, the meat is moist and tender as long as you don't over cook it! I cooked mine for about 7 hours, but it will depend on your slow cooker. Not to mention this makes 5 servings so you have some left overs! I served this chicken with grated cauliflower (as rice) my first night and had it as lettuce wraps and zucchini chips my second night. Variety is key when trying to eat healthy so that you never get bored with your meals. 

Enjoy!


Crock Pot Thai Chicken

Ingredients:

40 ounces raw boneless, skinless chicken breasts (5 Leaner Leans)
1 1/4 cup lite coconut milk (5 Healthy Fats)
1/2 cup PB2 aka powdered peanut butter (4 Snacks)
1/4 cup water
1 tbsp lite soy sauce (1 Condiment)
2 tbsp fresh lime juice (3 Condiments)
1/2 cup salsa (8 Condiments)
1/2 tsp ground ginger (1 Condiment)
1/2 tsp garlic powder (1 Condiment)
1 packet stevia - optional (1 Condiment)
Chopped cilantro for garnish

Directions:

Place raw chicken in the crock pot.
In a medium sized bowl, combine the rest of the ingredients. 
Stir until mixed thoroughly. Pour over chicken.
Cook on High for 3 to 4 hours or on Low 6 to 8 hours.
When cooked, shred chicken breasts with a fork.
Stir the shredded chicken with the sauce.
Divide into 5 equal portions.

5 Servings with 1 Leaner Lean, 3 Condiments, 1 Healthy Fat, and 0.8 Snacks per serving


I absolutely love grated cauliflower, especially when it is used as rice.
Trader Joes and a few other grocery stores sell pre-packaged grated cauliflower ready to use! Customers were going Ga-Ga over them! I remember when Trader Joes first started selling them, they were always sold out and it took some time before they had them in stock again! It was crazy! I guess I can understand why so many people loved them... they were convenient and required a little less prep work when preparing meals. I have used the pre-packaged grated cauliflower, but I actually prefer to grate it myself. I think it saves a little bit of money and it is so easy to do with a food processor. No matter if you purchase cauliflower already grated or if you grate it yourself, there are some creative ways to eat it such as avocado cauliflower rice!


This avocado cauliflower rice is creamy and delicious! It kind of reminds me of yummy guacamole mixed with rice since it has cilantro and lime in it. This is the perfect side dish that is sure to be a definite crowd pleaser! Keep in mind that if you are following the Optavia 5 and 1 plan, you need to choose a Leanest Lean to accompany this dish since this it already contains 2 Healthy Fats. Some great options are fish, shellfish, ground turkey or other meat that is more than 98% lean.


Start off by mashing 1 1/2 ounces of avocado with a fork.  Add fresh lime juice, garlic powder, salt and chopped cilantro. Set aside.


Heat a tsp of oil in a skillet. I used Stacey Hawkins Roasted Garlic oil to give the cauliflower more flavor. I love her flavored oils! If interested, you can purchase it HERECook cauliflower rice over medium heat for about 5 to 8 minute in a covered skillet.


Add the avocado mixture to the cauliflower rice. Stir until combined and heated thoroughly. If you have the cauliflower rice already prepped, this side dish is ready in less than 15 minutes! It is a nice change from eating plain cauliflower rice! I served it with grilled tilapia seasoned with Mrs. Dash Southwestern Chipotle Seasoning Blend. What a delicious Lean and Green! Enjoy!

Avocado Cauliflower Rice

Ingredients:
1 1/2 ounces avocado (1 Healthy Fat)
2 tsp fresh lime juice (1 Condiment)
1/8 tsp garlic powder (1/4 Condiment)
1/4 tsp salt (1 Condiment)
1/4 cup chopped cilantro (1/4 Condiment)
1 tsp Stacey Hawkins Roasted Garlic Oil or Olive Oil (1 Healthy Fat)
1 1/2 cups raw grated cauliflower (3 Greens)

Directions:
In a small bowl, mash avocado with a fork. 
Add lime juice, garlic powder, salt, and cilantro. Stir until combined. 
Continue mashing to get the mixture as smooth as possible.
Set aside.

Add 1 tsp oil to a medium sized skillet and heat over medium heat.
Add grated cauliflower. 
Cover skillet with a lid so that the cauliflower steams and becomes tender. 
Cook for about 5 to 8 minutes stirring occasionally.

Add avocado mixture to the cauliflower.
Mix until cauliflower is evenly coated. Heat thoroughly.

Makes 1 Serving
Each serving provides
3 Greens, 2.5 Condiments and 2 Healthy Fats


Powered by Blogger.