I know with Winter just a skip hop around the corner and a lot of you guys will be craving soup! I know I will! Nothing beats a good bowl of soup to warm your insides when it is freezing cold outside! Okay... I know Vegas doesn't get that cold, but being a Floridian most of my life, I sure do get cold easily!

I have fallen in love with kabocha squassh! It's currently my favorite type of squash. I am sorry spaghetti squash. You were my favorite, but I have moved on to something sweeter! Don't worry... our relationship will truly never end because I need you as my pasta!

Roasted is my favorite way to eat kabocha squash. Lately, I have been roasting ahead of time and then freezing it for later uses. Make sure the squash is cooled completely before freezing. Also, I like to measure out 1 1/2 cup portions (3 Greens) and stick them in freezer Ziploc bags. That way it's easy to pull out what I need . When I need the squash, I defrost it in the fridge overnight. For instructions on how to roast kabocha, check out my recipe for Baked Kabocha.

When you have your kabocha squash prepared, the soup is a cinch to make! Just combine the ingredients, simmer for about 10 minutes and blend. It doesn't get any easier than that! This would definitely be a great weeknight lunch or dinner. Just serve with your favorite Lean. You could also prepare the soup and then freeze it in freezable containers.

Feel free to adjust the spices to your taste! There are so many types of variations. I chose to do a basic soup with onion powder, garlic powder and parsley. Gosh, I am boring! The natural sweetness of the squash blended with savory spices makes this soup delicious! You could also try garlic powder, curry powder and garam masala for more of an Indian flavor. Or how about ground ginger, ground cinnamon and a dash of nutmeg to enhance the sweetness of the squash. Maybe even some cardamom or roasted sage? The possibilities are endless if you have a great soup base.

Kabocha squash is an excellent substitute for butternut or pumpkin squash with lower carbs and calories than the other two. It's perfect for a chilly day! Give it a try! Enjoy this yummy soup!


Roasted Kabocha Squash Soup

Ingredients:
3 cups roasted kabocha squash (6 Greens)
2 cups chicken broth (2 Condiments)
1 1/2 cups unsweetened cashew milk (1 1/2 Condiments)
1/2 tsp garlic powder (1 Condiment)
1/4 tsp onion powder (1/2 Condiment)
1/2 tsp dried parsley (1/6 Condiment)
1/8 tsp black pepper (1/4 Condiment)

Directions:
In a medium saucepan, combine all ingredients over medium high heat.
Bring the mixture to a boil and then let simmer for 10 to 15 minutes.
This simmering will get the flavors blended. Let cool slightly.

Add mixture to a blender and blend until smooth.
Evenly distribute the mixture into two bowls.

2 servings with 3 Greens and 3 Condiments per serving

Serve this soup with your favorite Lean! I love to eat this with two Trader Joes garlic and herb chicken sausages or two Al Fresco Andouille Chicken Sausages. No healthy fats needed! I slice up the links and heat them in a skillet until they are nice and brown. Then I throw them into the soup. Another option I like is shrimp because shrimp absorbs the flavor of everything! If you choose shrimp, don't forget to add two healthy fats!

Click Here to Print

I am fairly new to kabocha squash but man oh man... where has it been all my life? I have absolutely fallen in love with it! It tastes quite similar to butternut squash, pumpkin and sweet potatoes but with less carbs!


Kabocha squash is an Asian winter squash commonly known as Japanese pumpkins. It is slightly sweeter than butternut squash, but it has a less calories and carbs. One cup is only 40 calories and 7 grams of carbs! A great veggie for the low carb lovers or those trying to watch their waistline! Not to mention it has lots of beta carotene, iron and vitamins! The taste and texture is a combination of  both pumpkin and sweet potato. Pretty awesome marriage of flavors going on! That is why this squash makes a wonderful substitute for "pumpkin" pie and it works so well for the recipe below.


But wait... where do I find this yummy tasting veggie? I had no problems finding it at my local Trader Joes. They had tons for $2.29 each! I have also heard that they can also be found at local Asian markets (sometimes year round) and local farmers markets. Again, I am fairly new to this squash so I haven't really been searching a long time for it and I am lucky to have a Trader Joes by me.

They are usually available in late Summer to early Fall and can be stored in a cool dry place up to one month. You can extend the life of the squash by freezing it. Check out this site for Ways to Freeze Winter Squash. Try to use plain frozen kabocha squash within 3 months.


The outer layer of kabocha squash can be really tough to cut through. Microwave the squash for about a minute or two to soften it up some. Use a large sharp knife to cut the squash in half. You are really going to have to work at it to get that sucker open. It may help to cut the stem off at the top and then slice through the squash. 


Scoop out all the seeds and guts with a spoon. Guts just sound so appropriate with Halloween coming up, doesn't it?  :) 


Cut the squash into wedges. You can leave it as wedges, but I took it a step further and cut the wedges in half. Also, you can cut or peel the skin off before baking, but I chose to do it after baking since it was easier. Place the pieces on a baking sheet lined with non-stick foil. Spray non-stick cooking spray on the squash. I used coconut non-stick cooking spray, but whatever kind will do. Roast the squash for about 30 minutes and then flip the squash over and roast for another 15 minutes or until softened. Let cool.


Once cooled, cut or peel the skin away from the wedges and put the squash in a bowl. Measure out 2 cups for this recipe and store the rest. Add the 2 cups of squash to a blender. Then add all the other ingredients except the walnuts because those are for the topping.


Some people have asked me my sweetened of choice. I love these little packets of stevia that I get from Amazon. There is no bitter aftertaste! We can all appreciate that!


Once you have all your ingredients in the blender, blend until it is nice and smooth. If you need to add a little bit more unsweetened almond or cashew milk, please do so. I found 1/4 cup to be enough but some may like their pies to be a little less dense.


Spray four ramekins with non-stick cooking spray. Evenly distribute the mixture into the ramekins. Bake at 425 degrees for 15 minutes.


Reduce the temperature to 350 degrees. Remove the pies from the oven and add the walnuts. This is only an option of course. Seven walnut halves count as one optional snack, but I will tell you this... don't skimp on the nuts! The walnuts get toasted right on the pies and their natural flavors are enhanced. It takes the place of a traditional pie crust, except it is on top of course, and you really just won't miss it. Not to mention walnuts are the only nut with a significant source of plant-based, heart healthy omega-3 fats. If you like, make one or two pies with the nuts and leave the nuts off on the others.


Let the pies cool and add a little bit of fat free reddi whip and a sprinkle of ground cinnamon, if desired.


A heavenly dessert just in time for the holidays! Trust me when I say your house will smell like Fall when baking these desserts! Who needs pumpkin pie when I have this healthier version? I know I don't! Enjoy!


Baked Kabocha or 
Crustless "Pumpkin" Pie

Ingredients:
2 cups roasted kabocha squash (4 Greens)
1/4 cup unsweetened cashew or almond milk (1/4 Condiment)
2 egg whites
1/2 tsp ground cinnamon (1 Condiment)
1/2 tsp pumpkin pie spice (1 Condiment)
1/2 tsp maple or vanilla extract (1/2 Condiment)
1 packet NuStevia (1 Condiment)
28 Walnut halves (4 Snacks)

Directions:
Prepare kabocha:
Preheat oven to 400 degrees. Line a baking pan with non-stick foil. If the skin is too tough to cut, place kabocha in the microwave for 1 to 2 minutes. Cut the squash in half.

Spoon out all the seeds. You can cut or peel the skin off before baking, but I found it easier to peel after baking. Do whatever you prefer. Cut the squash into wedges. Lay the wedges on the prepared pan. Spray the wedges with non-stick cooking spray. Bake for 30 minutes. Flip the squash over. Spray with cooking spray. Bake for 10 to 15 minutes or until it is cooked.
Let cool. 

Once cooled, peel or cut off the skin with a knife. Normally I eat the skin when roasting but for this particular recipe, I like to remove the skin for a smoother richer taste.

Measure out 2 cups of cooked squash, without the skin. Use the rest of the squash for another time.

To make pies:


Preheat oven to 425 degrees. Spray 4 ramekins with non-stick cooking spray.  Add 2 cups of squash, without the skin, and the rest of the ingredients, except walnuts to the blender. Blend until smooth. Pour mixture into ramekins. Bake for 15 minutes. 

Reduce heat to 350 degrees. Remove ramekins from oven and evenly distribute the walnuts on top of each ramekin. Bake for an additional 25 minutes.

Makes 4 Servings
Each Serving provides
1 Green, 1 Condiment and 1 Optional Snack


With the football season, I know that it can be difficult to find delicious appetizers that will appeal to everyone! But trust me... there ARE healthier food options out there that actually taste good! I mean... yeah... I still love buffalo hot wings, a yummy bowl of chili with all the fixings, burgers, sub sandwiches, chips, etc, but I have found some pretty tasty alternatives to my favorite party foods. This is one of them! I love spicy jalapenos mixed with ooey gooey cheese and the creamy goodness of Greek yogurt and cream cheese. Adding chicken packs this dip with extra protein and makes it more filling so you can have it as a complete meal with veggies!


What makes this dish even better is that you can prep your chicken ahead of time. Prepping your chicken ahead of time makes this dish so easy to put together right before game time! No one wants to be stuck in the kitchen during game time! Come on! You can always buy a rotisseries chicken from the grocery store. Remove the skin and bones and shred it up.


If you want to prepare your own chicken, my favorite way to cook chicken breasts is in the slow cooker. The slow cooker always gets the chicken breasts really moist as long as you do not over cook it. This is how I make my shredded chicken breasts:

Quick and Easy Crock Pot Shredded Chicken

Ingredients:
3 pounds of chicken breasts or tenderloins (6 Leaner)
1 cup chicken broth (1 Condiment)
Seasonings of choice ~ subtract from your Condiments
(I like salt, pepper, garlic powder and onion powder)

Directions:
Season the defrosted chicken and then place them in the slow cooker.
Pour chicken broth over the chicken.
Cook 6 to 8 hours on LOW or 3 to 4 hours on High.
Drain the chicken and shred the chicken with two forks. 
All done! Now you have enough chicken for a few meals!

Makes 6 Servings
Each serving provides
1 Leaner (Condiments will vary)


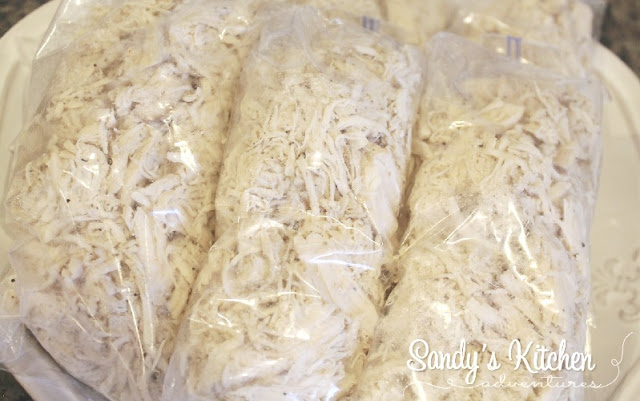
Weigh out 6 ounces of chicken and then place the portions into Ziploc baggies. Usually I put a few bags in the fridge and the rest in the freezer for later. These little baggies are great when I am craving chicken or need them for a recipe.


This recipe calls for 12 ounces of cooked chicken so I used my awesome scale to do all the measuring for me. Not to mention if you try to eyeball how much chicken you think you should have, it may not be accurate. You may be cheating yourself of some much needed protein or you may be eating too much.


Now that your chicken is measured out, you can add all the other ingredients except half the cheese which is for the topping. Give it a good stir because you wouldn't want any pieces to feel left out!


Pour the mixture into a baking dish. Spread it out evenly. Then top with the remaining cheese. Bake for about 20 minutes or until cheese is melted.


The entire dish makes 4 servings. I took out my portion and put it in my own personal ramekin and served it with sweet mini peppers. Those darn veggies are addictive! This dip would also make a delicious wrap because they have a thick consistency like chicken salad. Enjoy!


Jalapeno Popper Chicken Dip

Ingredients:
12 ounces cooked shredded chicken breasts or use the breast meat from a rotisserie chicken from the grocery store (2 Leaner)
3/4 cup Fage low fat plain Greek yogurt (1/2 Leaner)
4 ounces reduced fat cream cheese (4 Healthy Fats)
6 slices turkey bacon cooked and crumbled (1/2 Lean)
3 ounces canned jalapenos, diced (3 Optional Snacks)
1/2 tsp garlic powder (1 Condiment)
1/2 tsp onion powder (1 Condiment)
1/4 cup grated fresh Parmesan cheese (4 Condiments)
1 cup shredded reduced fat sharp cheddar cheese, divided (1 Lean)

Directions:
Preheat oven to 375 degrees.
Combine shredded chicken, yogurt and cream cheese in a medium sized bowl.
Add crumbled turkey bacon, diced jalapenos, garlic powder, onion powder, parmesan cheese and 1/2 cup cheddar cheese.
Stir until combined. Pour mixture into a baking dish.
Top with remaining 1/2 cup shredded cheese.
Bake for 20 minutes or until cheese has melted.

Makes 4 Servings
Each serving provides 
1 Leaner, 1 1/2 Condiments, 1 Healthy Fat and 3/4 Optional Snack


Boy, do I have a yummy and healthy side dish for you! Jicama fries! They are a great alternative to traditional french fries made from potatoes. The texture is slightly different from regular french fries because of their crunchy, crisp texture, but the flavor is all there!


What is jicama? I know I absolutely had no clue until I recently began exploring some veggies I never dreamed I would eat, nonetheless love! Jicama is a root vegetable that is from Mexico, but it can be found in almost any grocery store here in the USA. It is slightly sweet like an apple or pear, but it also reminds me of water chestnuts. Smaller jicamas are younger and sweeter, while the larger ones have a more starchier taste. It is very low calorie, has lots of vitamin C, and it is one of the finest sources of dietary fiber. This allows it to be an ideal sweet snack for diabetics and those trying to lose weight. What is not to love? 


There are a variety of ways to enjoy this vegetable, but roasted in the oven as fries is my favorite. Mainly because roasting helps bring out the sweetness in veggies. You can also eat these raw in a salad or by themselves as a snack!


First thing you need to do when making fries is slice off the top. Then peel the skin with a knife. I have seen some peel with their fingers or a vegetable peeler. Do whatever you prefer, as long you get that skin off!


Slice the jicama into thin strips so that they resemble fries. I started off by cutting the jicama into 4 sections. Then slicing them into 1/4 inch strips. Add jicama to boiling water and cook for 10 min. Drain water and pat dry fries. Add olive oil. This will help the spices adhere to the jicama.


Add those spices! I used paprika, onion powder, and garlic powder but there really is no limit on what spices to use. Chili powder, garlic powder or other seasoning blends such as Mrs. Dash work well too! Experiment until you find what you like. Next time I might try smoked paprika in place of the regular paprika. Toss it around and make sure all the fries are evenly coated. We wouldn't want the other fries to get jealous! Personally, I used my hands to mix it around, rubbing the spice mixture into the jicama.


I put a sheet of parchment paper on a baking sheet for easy clean up. Plus, I always have it around for those cauliflower pizza crusts! Place the fries in a single layer on the baking sheet. Bake in a preheated oven for 30 minutes, flipping once.


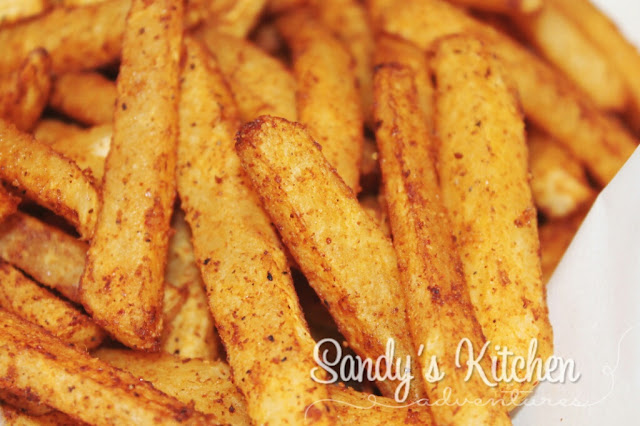
Voila! Delicious healthy fries!

They will be kind of crunchy in the center and will never reach the texture of regular fries no matter how long you bake them because I know... I tried! It still tastes very yummy though! Serve them with some ranch dressing for an extra treat!


Jicama Fries

Ingredients:
3 cups (13.74 ounces) jicama, sliced (6 Greens)
2 tsp olive oil (2 Healthy Fats)
1/2 tsp paprika (1 Condiment)
1/4 tsp onion powder (1/2 Condiment)
1/4 tsp garlic powder (1/2 Condiment)
salt and pepper, if desired

Directions:
Preheat oven to 425 degrees.
Remove the skin from the jicama by cutting the top off the jicama and then peeling it with a knife. It is very similar to how you would peel an apple.
Then cut the jicama into thin sections, like fries. Bring water in a medium saucepan to a boil. Add jicama fries and boil for 10 min. Drain and pat dry fries.
Toss the fries in a bowl and add olive oil, paprika, onion powder and garlic powder, salt, and pepper. Coat the fries evenly with the spices.
Bake fries for 35 to 40 minutes, flipping them halfway through.

Makes 2 Servings
Each serving provides
3 Greens, 1 Condiment, and 1 Healthy Fat

To cook in the air fryer:
Preheat air fryer for 2 to 3 min at 400 degrees. Place fries in air fryer and cook for about 15 to 20 min, shaking the basket every 5 min.

This is such a great dish to bring to your next potluck or BBQ! I substituted plain Greek yogurt for most of the mayo to lighten it up.


This healthier version is delicious and has added flavor from sliced almonds, bacon bits and cheese! 


So let's get to the recipe which is so easy because it doesn't involve cooking! No need to get your kitchen hot when summer comes around the corner. Just take 3 cups of broccoli florets in place them in a bowl. Make sure the broccoli has been washed. If you want to save time, you can purchase the broccoli florets already cut up.


Next, you will need to make the yogurt sauce which consists of yogurt, mayo, sweetener, apple cider vinegar and salt. I like to use NuNaturals NuStevia white stevia powder packets. I find they do not leave a bitter after taste, but you can use your choice of sweetener. If you are interested, I get my stevia packets on Amazon.


Get that broccoli coated!


Add the sliced almonds for added crunch!


Add  some yummy savory bacon bits that go well with the sweetened yogurt sauce.


And of course we can't forget the cheese! Stir it all up and you have a delicious quick and easy side dish!


 Skinny Broccoli Salad

Ingredients:
3 cups broccoli florets (6 Greens)
1/4 cup 2% Fage plain Greek yogurt (1/6 Lean)
2 tbsp reduced fat mayo (2 Healthy Fats)
2 packets Nu Naturals Stevia or sweetener of choice (2 Condiments)
1 tbsp apple cider vinegar (1/2 Condiment)
1/4 tsp salt, optional (1 Condiment)
2 tbsp low sodium real bacon bits (2 Condiments)
1 oz sliced almonds (2 Optional Snacks)
1/3 cup reduced fat shredded cheddar cheese (1/3 Lean)

Directions:
Place washed broccoli florets in a medium sized bowl, set aside.
In a small bowl, combine yogurt, mayo, sweetener, vinegar and salt. Stir until smooth.
Pour yogurt mixture over broccoli and stir until all combined. Add sliced almonds, bacon and cheese. Toss gently until all pieces are evenly coated. 

Makes 2 Servings
Each Serving provides:
1/4 Lean, 3 Greens, 3 Condiments, 1 Healthy Fat and 1 Optional Snack 
You still need to add 3/4 Leaner or Leanest to complete your Lean for the day.

Some examples:
4.5 oz chicken breast from the Leaner category
5.2 oz of shrimp, tilapia, 99% lean ground turkey, or 1 1/2 cup egg beaters from the Leanest category plus 1 additional Healthy Fat


Nothing beats comfort food like mac and cheese! I absolutely love mac and cheese, but I don't love all the carbs and calories that come with it! Those I can definitely live without! This recipe is a great alternative to traditional mac and cheese and it tastes pretty darn good if I do say so myself. You still get the same great taste from the gooey cheese sauce, but without the starch from pasta. 

I gave this mac and cheese a little kick by adding some green chilies, green peppers and taco seasoned ground beef. Mexican Mac and Cheese! Sometimes you need to add a little variety to your meals!


And why did I need comfort food on this very day? Not that I needed a reason to make comfort food, but if I had a reason, it just might make me feel better. Okay... probably not, since this dish is totally on plan and I have no guilt whatsoever in devouring it because yes... that is what I did. Not a morsel left on my plate. It just felt like I was cheating, even though I wasn't.


Now this is what I saw outside in my backyard! A cloudy rainy day in Vegas screams comfort food!


Not only was it raining, but there was hail! In the month of May! Now if that doesn't scream comfort food, then I don't know what does.


I cut up the cauliflower into small bite size pieces and cooked them until tender. You can use frozen or fresh cauliflower for this recipe, but I used fresh.


I added canned green chilies, green peppers and jalapenos to the cauliflower, but feel free to use red peppers instead of the green for extra color.


Then add taco seasoned ground beef.


Stir it up and set aside because it is time to make the best part! The cheese sauce!


Add all the ingredients for the sauce and stir until smooth.


Pour the sauce over the cauliflower and ground beef mixture.


Give it a good stir and make sure all the bits and pieces are coated with the cheese sauce. You wouldn't want any piece to feel left out!


Pour it into a casserole dish.


Sprinkle the rest of the cheese on top and pop it in the oven for about 15 minutes or until the cheese is melted. Enjoy!

Mexican Mac and Cheese

Ingredients:
7.5 oz cooked 93% lean ground beef, fat drained (1 1/2 Leans)
2 tsp low sodium taco seasoning mix (4 Condiments)
5 cups cooked cauliflower, cut into small florets (10 Greens)
1/2 cup chopped green chilies (1 Green)
1/2 cup green or red peppers, diced (1 Green)
1 oz pickled jalapenos, chopped (1 Optional Snack)

For the sauce:
1 cup unsweetened cashew milk (1 Condiment)
4 tbsp or 2 oz reduced fat cream cheese (4 Condiments)
1 tsp dijon mustard (1 Condiment)
1 tbsp Kraft reduced fat grated parmesan cheese (1/2 Condiment)
1/4 tsp garlic powder (1/2 Condiment)
1 1/2 cups shredded reduced fat Mexican or sharp cheddar cheese (1 1/2 Leans)

Topping:
1 cup shredded reduced fat Mexican or sharp cheddar cheese (1 Lean)

Directions:
Preheat oven to 375 degrees. Spray a 9 inch square casserole dish lightly with cooking spray.

Combine cooked ground beef with taco seasoning mix and 3 tbsp of water in a small skillet. Heat over medium high heat. Cook until sauce thickens, about 4 to 5 minutes stirring occasionally.

In a large bowl, combine seasoned ground beef, cauliflower pieces, green chilies, green or red peppers and jalapenos. Set aside.

Pour cashew milk into a medium sized sauce pan over medium-low heat. Add the cream cheese, dijon mustard, parmesan cheese, and garlic powder. Stir until combined and cream cheese is melted. Add 1 1/2 cups cheese. Continue cooking until cheese is melted and sauce is nice and smooth, about 2 minutes.

Pour the cheese sauce over the cauliflower beef mixture and stir until everything is coated with the cheese sauce. Pour mixture into a prepared dish. Sprinkle 1 cup of cheese over the top. Bake for about 15 minutes or until cheese is melted. Divide into 4 equal portions.

4 Servings with 
1 Lean, 3 Greens, 2.75 Condiments and 1/4 Optional Snack per serving

Click Here to Print

Powered by Blogger.