This is such a great dish to bring to your next potluck or BBQ! I substituted plain Greek yogurt for most of the mayo to lighten it up.


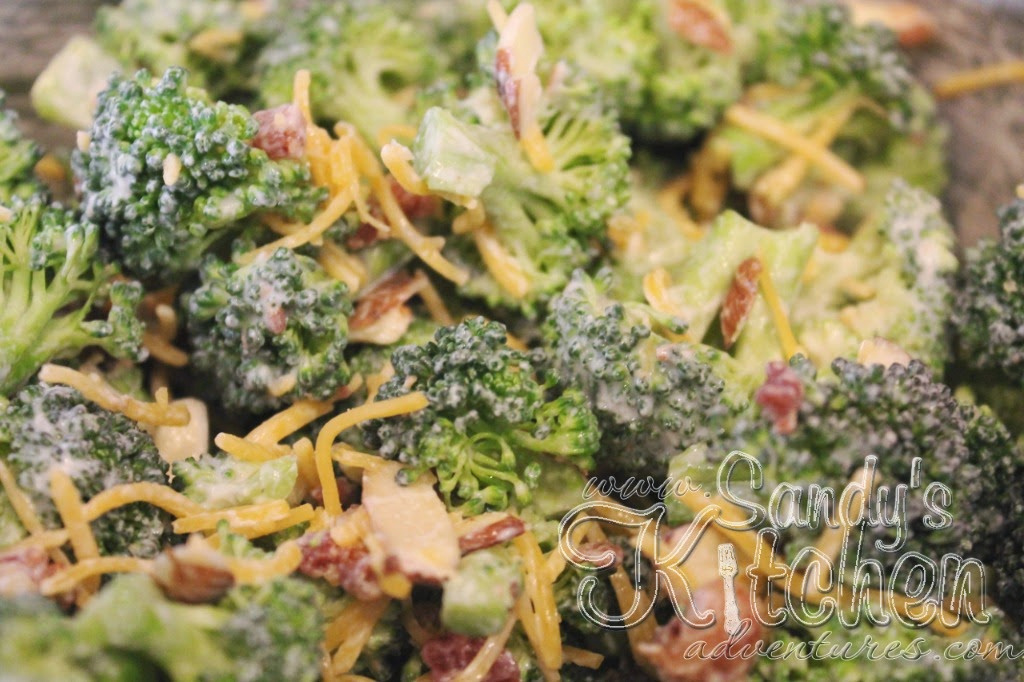
This healthier version is delicious and has added flavor from sliced almonds, bacon bits and cheese! 


So let's get to the recipe which is so easy because it doesn't involve cooking! No need to get your kitchen hot when summer comes around the corner. Just take 3 cups of broccoli florets in place them in a bowl. Make sure the broccoli has been washed. If you want to save time, you can purchase the broccoli florets already cut up.


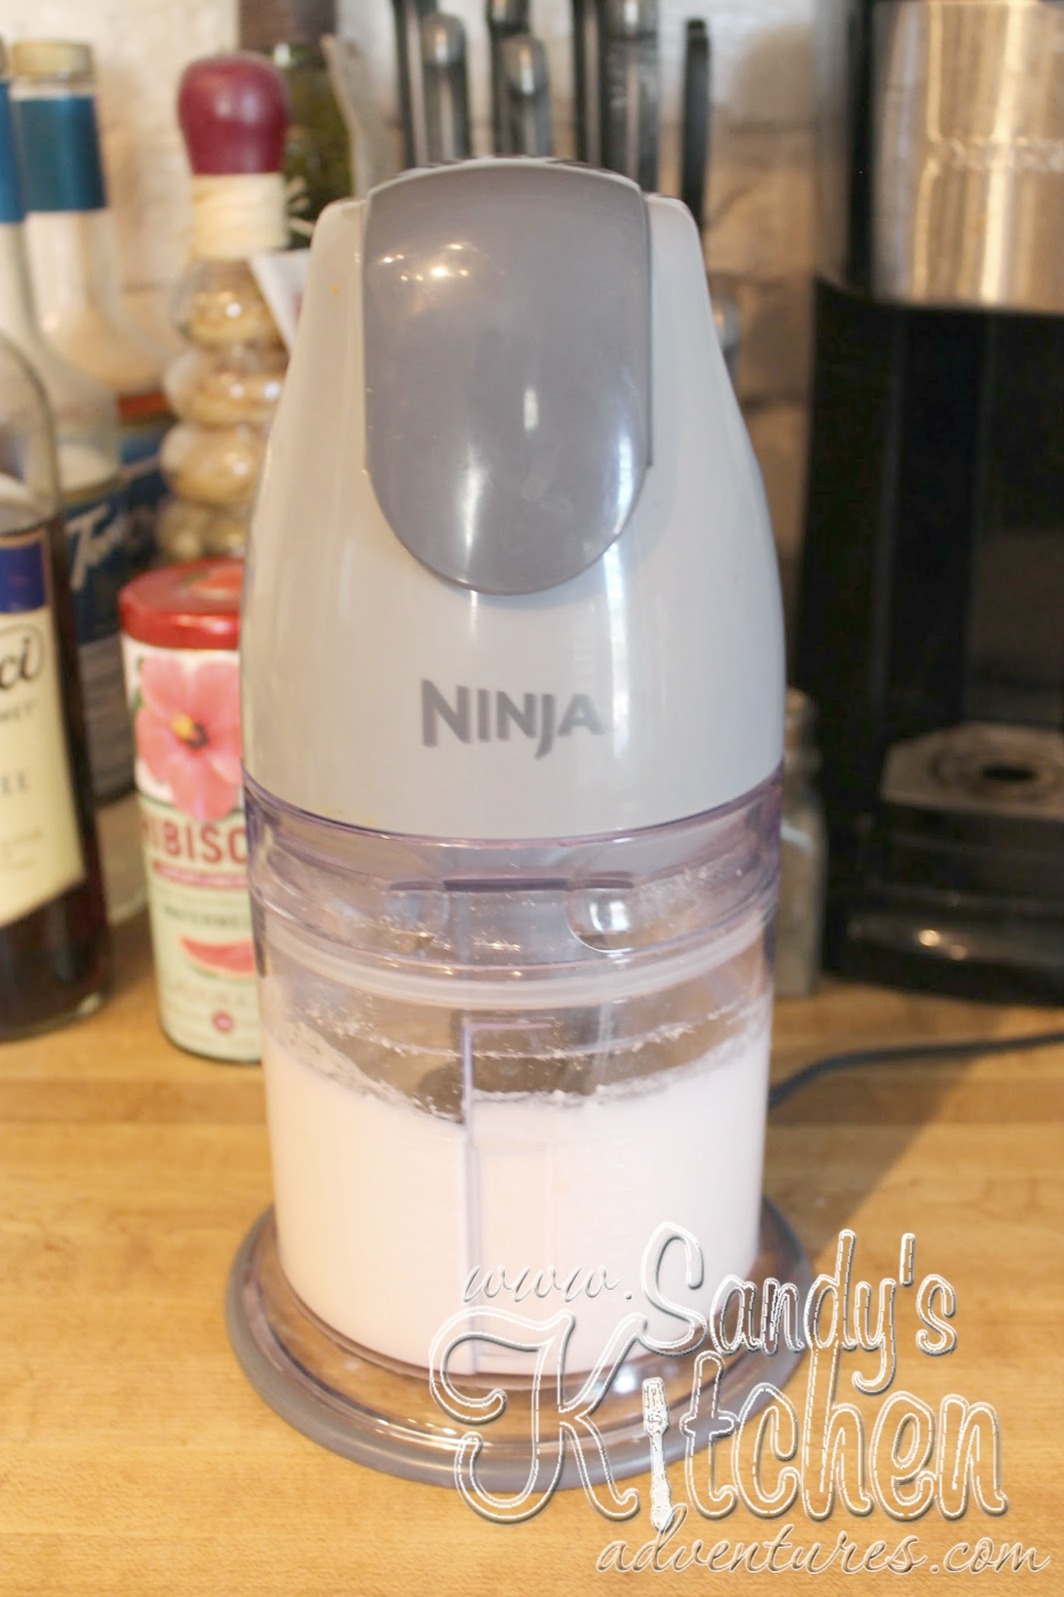
Next, you will need to make the yogurt sauce which consists of yogurt, mayo, sweetener, apple cider vinegar and salt. I like to use NuNaturals NuStevia white stevia powder packets. I find they do not leave a bitter after taste, but you can use your choice of sweetener. If you are interested, I get my stevia packets on Amazon.


Get that broccoli coated!


Add the sliced almonds for added crunch!


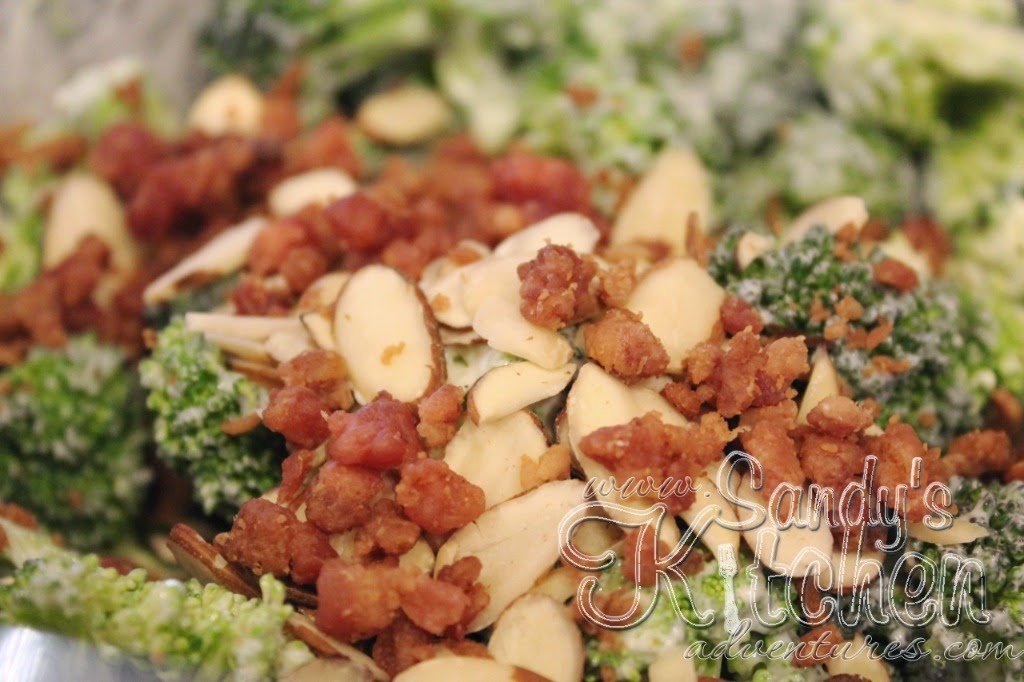
Add  some yummy savory bacon bits that go well with the sweetened yogurt sauce.


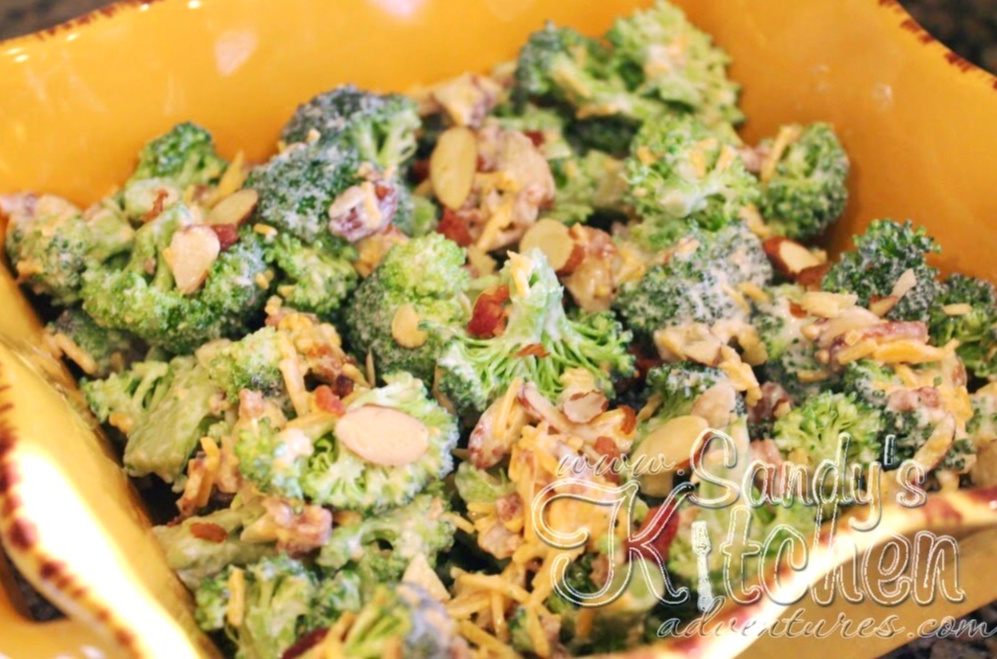
And of course we can't forget the cheese! Stir it all up and you have a delicious quick and easy side dish!


 Skinny Broccoli Salad

Ingredients:
3 cups broccoli florets (6 Greens)
1/4 cup 2% Fage plain Greek yogurt (1/6 Lean)
2 tbsp reduced fat mayo (2 Healthy Fats)
2 packets Nu Naturals Stevia or sweetener of choice (2 Condiments)
1 tbsp apple cider vinegar (1/2 Condiment)
1/4 tsp salt, optional (1 Condiment)
2 tbsp low sodium real bacon bits (2 Condiments)
1 oz sliced almonds (2 Optional Snacks)
1/3 cup reduced fat shredded cheddar cheese (1/3 Lean)

Directions:
Place washed broccoli florets in a medium sized bowl, set aside.
In a small bowl, combine yogurt, mayo, sweetener, vinegar and salt. Stir until smooth.
Pour yogurt mixture over broccoli and stir until all combined. Add sliced almonds, bacon and cheese. Toss gently until all pieces are evenly coated. 

Makes 2 Servings
Each Serving provides:
1/4 Lean, 3 Greens, 3 Condiments, 1 Healthy Fat and 1 Optional Snack 
You still need to add 3/4 Leaner or Leanest to complete your Lean for the day.

Some examples:
4.5 oz chicken breast from the Leaner category
5.2 oz of shrimp, tilapia, 99% lean ground turkey, or 1 1/2 cup egg beaters from the Leanest category plus 1 additional Healthy Fat


Nothing beats comfort food like mac and cheese! I absolutely love mac and cheese, but I don't love all the carbs and calories that come with it! Those I can definitely live without! This recipe is a great alternative to traditional mac and cheese and it tastes pretty darn good if I do say so myself. You still get the same great taste from the gooey cheese sauce, but without the starch from pasta. 

I gave this mac and cheese a little kick by adding some green chilies, green peppers and taco seasoned ground beef. Mexican Mac and Cheese! Sometimes you need to add a little variety to your meals!


And why did I need comfort food on this very day? Not that I needed a reason to make comfort food, but if I had a reason, it just might make me feel better. Okay... probably not, since this dish is totally on plan and I have no guilt whatsoever in devouring it because yes... that is what I did. Not a morsel left on my plate. It just felt like I was cheating, even though I wasn't.


Now this is what I saw outside in my backyard! A cloudy rainy day in Vegas screams comfort food!


Not only was it raining, but there was hail! In the month of May! Now if that doesn't scream comfort food, then I don't know what does.


I cut up the cauliflower into small bite size pieces and cooked them until tender. You can use frozen or fresh cauliflower for this recipe, but I used fresh.


I added canned green chilies, green peppers and jalapenos to the cauliflower, but feel free to use red peppers instead of the green for extra color.


Then add taco seasoned ground beef.


Stir it up and set aside because it is time to make the best part! The cheese sauce!


Add all the ingredients for the sauce and stir until smooth.


Pour the sauce over the cauliflower and ground beef mixture.


Give it a good stir and make sure all the bits and pieces are coated with the cheese sauce. You wouldn't want any piece to feel left out!


Pour it into a casserole dish.


Sprinkle the rest of the cheese on top and pop it in the oven for about 15 minutes or until the cheese is melted. Enjoy!

Mexican Mac and Cheese

Ingredients:
7.5 oz cooked 93% lean ground beef, fat drained (1 1/2 Leans)
2 tsp low sodium taco seasoning mix (4 Condiments)
5 cups cooked cauliflower, cut into small florets (10 Greens)
1/2 cup chopped green chilies (1 Green)
1/2 cup green or red peppers, diced (1 Green)
1 oz pickled jalapenos, chopped (1 Optional Snack)

For the sauce:
1 cup unsweetened cashew milk (1 Condiment)
4 tbsp or 2 oz reduced fat cream cheese (4 Condiments)
1 tsp dijon mustard (1 Condiment)
1 tbsp Kraft reduced fat grated parmesan cheese (1/2 Condiment)
1/4 tsp garlic powder (1/2 Condiment)
1 1/2 cups shredded reduced fat Mexican or sharp cheddar cheese (1 1/2 Leans)

Topping:
1 cup shredded reduced fat Mexican or sharp cheddar cheese (1 Lean)

Directions:
Preheat oven to 375 degrees. Spray a 9 inch square casserole dish lightly with cooking spray.

Combine cooked ground beef with taco seasoning mix and 3 tbsp of water in a small skillet. Heat over medium high heat. Cook until sauce thickens, about 4 to 5 minutes stirring occasionally.

In a large bowl, combine seasoned ground beef, cauliflower pieces, green chilies, green or red peppers and jalapenos. Set aside.

Pour cashew milk into a medium sized sauce pan over medium-low heat. Add the cream cheese, dijon mustard, parmesan cheese, and garlic powder. Stir until combined and cream cheese is melted. Add 1 1/2 cups cheese. Continue cooking until cheese is melted and sauce is nice and smooth, about 2 minutes.

Pour the cheese sauce over the cauliflower beef mixture and stir until everything is coated with the cheese sauce. Pour mixture into a prepared dish. Sprinkle 1 cup of cheese over the top. Bake for about 15 minutes or until cheese is melted. Divide into 4 equal portions.

4 Servings with 
1 Lean, 3 Greens, 2.75 Condiments and 1/4 Optional Snack per serving

Click Here to Print

Just in time for Fall! 

Something about the smell of cinnamon and baked apples cooking in the oven during the Fall season brings back such wonderful memories from my favorite season!


Have you ever tried jicama? They are a white fibrous root vegetable native to Mexico, but you can find them in all of the grocery stores here. In my opinion, it is a cross between a carrot and an apple. Delicious eaten raw or cooked! Great thrown into salads! They can be wonderful substitutes for apples because they are subtly sweet, crisp and crunchy. The only difference you may notice is that they don't get really soft like apples when baking, but  they taste pretty darn good.


I peeled and cubed the jicama in very small pieces (like how you would cube potatoes for hash browns), but you can also slice them really thin like apple slices. You want to make the pieces small or thin so they cook easier and faster. 


Add some cinnamon, apple pie spice and stevia along with the melted butter. If you do not have apple pie spice, it is okay. You can always double up on the cinnamon or add more cinnamon with a touch of nutmeg and allspice.


Get it all the pieces of jicama evenly coated with the spices and butter.


Spread the pieces over a foil lined baking pan.


Cover with foil and bake for 20 minutes. Then uncover and bake for 15 more minutes.


I made three 1 cup servings, but you could always have only 1/2 a cup as 1 Green and have other veggies as your other Greens so that this could be a little dessert with dinner. I hope you enjoy it as much as me! Delicious!


Baked Cinnamon Jicama (Apples)

Ingredients:
3 cups jicama peeled and cubed or sliced thin (6 Greens)
3 tbsp light Land O' Lakes Butter with Canola Oil, melted (3 Healthy Fats)
1/4 tsp apple pie spice (1/2 Condiment)
1/4 tsp ground cinnamon (1/2 Condiment)
3 packets stevia in the raw (3 Condiments)

Optional Toppings:
2 tbsp Walden Farms caramel syrup (1 Condiment)
2 tbsp Fat Free Reddi Whip (1 Condiment)

Directions:
Preheat oven to 350 degrees. Line a cookie sheet or baking pan with non-stick foil.

Mix jicama with melted butter in a medium sized bowl. Add cinnamon, apple pie spice, and stevia stirring until combined. Pour onto a foil lined pan. Cover with foil. Bake for 20 minutes. Uncover and bake an additional 15 minutes.

The jicama will not get completely soft when baking. Expect to have a slight crisp center when eating and a slightly sweetened taste. Enjoy!

3 (1 cup) servings

Per Serving:
2 Greens, 2 Condiments and 1 Healthy Fat
(still need 1 more Green)


I am so excited to share this recipe with you guys! Both the hubs and I approve and that says a lot considering hubby loves his whole wheat pasta! In the past, I would have normally made this dish with pasta, but spaghetti squash works really well for this dish. If you haven't tried spaghetti squash yet, then you don't know what you are missing! It has a nice slight crunch and packed with nutrients, but it does resemble spaghetti noodles, hence the name, "spaghetti" squash. I don't think you will miss pasta, once you try this dish. If you need a tutorial on how to prepare spaghetti squash using a microwave, you can go HERE.

I also substituted Greek yogurt for sour cream which is often found with Mexican dishes. Greek yogurt is so versatile because it can be a healthier substitute for sour cream, mayonnaise and even butter! It helps make dishes thick and creamy without adding all the calories. You gotta love that!

This casserole does freeze well so that is a plus in my book. You got to love those make ahead freezer meals, especially for those busy week nights! It will definitely be a meal found in my freezer.


Yummy comfort food and the perfect dish if you are craving Mexican!


Substituting Greek yogurt for sour cream helps lighten this dish without skimping on flavor! The sauce is a blend of Greek yogurt, enchilada sauce, with a little bit of chili powder to give it extra kick.


Adding the chopped green pepper while the ground beef is cooking softens them up some and gives the beef more flavor.


Rotel tomatoes also help add more zest to the meat with it's perfect blend of tomatoes, green chili peppers and spices. Love this stuff in my Mexican dishes.


Look at that color! Christmas anyone? :)


Drain all the fat and liquids from the eat using a strainer. Return the meat back to the skillet and add the yummy sauce you prepared earlier. Stir until all the lumps from the cream cheese disappear and the sauce becomes smooth.


Next add the spaghetti squash and give it a good stir. Pour the mixture into a casserole dish.


Top with cheese and bake until the cheese is melted. Delicious!


Mexican Ground Beef Casserole

Ingredients:
4 1/2 cups spaghetti squash, cooked (9 Greens)
1 can Rotel tomatoes (2 1/2 Greens)
1/4 cup green pepper, chopped (1/2 Green)
1.25 pounds 93% lean ground beef (3 Leans)
2/3 cup shredded 2% reduced fat Mexican style cheese (2/3 Lean)
1/2 cup 2% plain Fage Greek yogurt (1/3 Lean)
1/2 cup red enchilada sauce (8 Condiments)
3 tbsp reduced fat cream cheese (3 Condiments)
1/2 tsp chili powder (1 Condiment)

Directions:
Preheat oven to 350 degrees. 

In a medium sized bowl, combine enchilada sauce, Greek yogurt, cream cheese, and chili powder. Stir until combined. It is okay if the mixture is a little lumpy from the cream cheese. The cream cheese will eventually melt when combined with the warm ground beef and spaghetti squash. Set aside.

Over medium high heat, add ground beef, chopped green peppers, and can of Rotel tomatoes to a large skillet. Cook until ground beef is no longer pink and green pepper is tender. Drain meat of all fat and liquid.

Add spaghetti squash and enchilada sauce mixture to the ground beef. Stir until everything is combined.

Pour the mixture into a casserole dish. I used a deep 9 inch square casserole dish. Top with Mexican style cheese. Bake for about 25 minutes or until cheese is melted.

Makes 4 Servings
Each serving provides
1 Lean, 3 Greens, and 3 Condiments


I absolutely love curry so I wanted to try it on some roasted cauliflower. Wow! It was delicious! It was sooo good that I had to have it 3 days in a row! Yes, it was that yummy! I just love how curry adds a warm spice flavor, along with the smoked paprika, and bring boring cauliflower to life.


Hubby gives it two thumbs up too! He is one of the reasons why I had to make it again... and again.... and again. I think by the third day, we were ready to move on to a different veggie :)


It is so easy to make! You could use one medium head of cauliflower and cut it up into bit sized florets or you could buy the cauliflower already cut up and ready to go in the produce section.


I used three different spices: curry powder, smoked paprika and garlic salt. I think they make a nice combination of spices. Feel free to use regular salt if you don't have garlic salt. As for the smoked paprika, I would rather stick with smoked paprika rather than regular paprika because it gives a sweet smokey taste.


Add 1 tbsp of olive oil to the bowl of cauliflower. Toss the oil and cauliflower around in the bowl. Try to make sure all the cauliflower florets get covered with the oil as much as possible. Pour the cauliflower into a gallon sized Ziploc bag.


Sprinkle the spice mixture over the cauliflower in the bag. Shake the bag and massage the cauliflower with the spices so that all the florets are covered.


Pour the cauliflower onto a baking sheet lined with non-stick foil.


Bake at 425 degrees for about 25 to 30 minutes, turning once half way through. Mmmmm... delicious curry roasted cauliflower!


Curry Roasted Cauliflower

Ingredients:
4 1/2 cups raw cauliflower cut into bite-sized florets (9 Greens)
1 tbsp olive oil (3 Healthy Fats)
1 tsp curry powder (2 Condiments)
1/2 tsp smoked paprika (1 Condiment)
1/2 tsp garlic salt (2 Condiments)

Directions:
Preheat oven to 425 degrees. Line a baking pan with non-stick aluminum foil. Combine oil and cauliflower florets in a gallon size Ziploc bag and shake the bag until combined. Try to make sure all the florets are coated with oil. Then put the curry powder, smoked paprika and garlic salt in a small bowl and stir until combined. Pour the spice mixture over the cauliflower florets and shake the bag until all the pieces are coated with the spice mixture.

Spread the cauliflower florets on prepared pan lined with non-stick aluminum foil. Bake for about 25 minutes; stirring halfway through.

3 Servings with 
3 Greens, 1.7 Condiments, and 1 Healthy Fat per Serving


This is Not Your Mama's Alfredo Sauce for a reason. This recipe doesn't have all the cream, butter, flour and other unhealthy ingredients that traditional Alfredo recipes might have. It actually has only a few ingredients, but with those few ingredients, it packs a ton of flavor.


What I like most about this sauce is that it is smooth, thick and creamy. It really sticks to the squash noodles and chicken. No watery sauce for me!


I used my Ninja to blend the ingredients together but you can use any small blender you like. You just want to blend until all the ingredients have a smooth texture, resembling sauce. I added cottage cheese, garlic powder, Parmesan cheese, unsweetened almond milk and black pepper. That's it! You are done! Easy peasy!


The sauce is actually a great source of protein because of the cottage cheese and it doesn't have a lot of fat! It is right up my alley!


You can kind of see the thickness in this photo. Feel free to add a little more almond milk if you don't want the sauce as thick.


Slap on that sauce!

I chose to serve the sauce on spiraled yellow squash and zucchini so that it resembled pasta. My favorite spiralizer is Paderno which I got from Amazon. Right now it is running about $35 with free shipping, but the price is always changing so check it out. They are really simple to us. You just press the zucchini against the blade of the slicer and crank the handle. As you crank the handle, the spirals come out on the other side. The best part about this machine, is that you don't have to worry about your hand coming in contact with the blade while you are spiraling. Also, this machine will take out the core of the squash which has the seeds. The seeds prevent the noodles from holding together, so you want to make sure the core isn't included.

Another option is the Veggetti which is also on Amazon but I think you can find it in some of the big box stores such as Target and Bed Bath and Beyond. This runs around $13.

You can also use any julienne peeler you like and get great results. These are easy to find and run around $10 or less. If you use one of these peelers, you would pass the peeler down the side of the squash, lengthwise. When you approach the seeds, turn the zucchini and slice another side.

Chicken Alfredo never looked so good! With added color from the squash, healthy nutrients from using veggies instead of pasta, and creamy sauce packed with protein... what more could I ask for in kick starting my weight loss? Enjoy!


Not Your Mama's Chicken Alfredo

Ingredients:
4 oz grilled or baked chicken, sliced or diced (2/3 Leaner)

For Alternative Pasta:
1 1/2 cups yellow squash and/or zucchini, spiralized (3 Greens)
1 tsp olive oil (1 Healthy Fat)
1/4 tsp dried basil (1/8 Condiment)

Alfredo Sauce:
1/2 cup 1% cottage cheese (1/3 Leaner)
1/8 tsp salt (1/2 Condiment)
1/2 tsp garlic powder (1 Condiment)
1 tbsp reduced fat grated Parmesan cheese (1/2 Condiment)
1 tbsp unsweetened almond milk (1/16 Condiment)
1/8 tsp Fresh ground pepper (1/4 Condiment)

Directions:
Prepare your squash. You can peel your squash so that it resembles pasta or leave the peel on to add more color to the dish. I like to leave it on because the peel has extra fiber that can regulate your digestive system. Cut the ends off and discard. Next decide which gadget you want to use to make your noodles. Measure out 1 1/2 cups.

Add 1 tsp olive oil to a medium skillet and heat over medium-high heat. Add spiraled squash to the oil and cook until squash gets tender for about 2 minutes. Add basil and any other additional seasonings such as salt, pepper, or garlic powder if desired. Put on a plate and set aside.

To make Alfredo sauce, combine cottage cheese, salt, garlic powder, Parmesan cheese, almond milk and pepper in a small blender until mixture is smooth and creamy. Pour into a microwave safe dish and heat until warm (about 45 sec to 1 min), stopping the microwave every 15 seconds to stir. Make sure the cottage cheese doesn't get too hot because cottage cheese and heat do not mix well. It will start to separate, get stringy, and watery. Once it was mixed with the squash and chicken, I had no problems with re-heating.

Place cooked diced chicken over squash noodles and then pour warm sauce on top. Enjoy!

1 Serving with 
1 Leaner, 3 Greens, 2.5 Condiments, and 1 Healthy Fat

Powered by Blogger.